Here we are going to explore what Solace PubSub+ is, what it can do and how Solace MuleSoft Integration can be easily achieved.
Introduction to Solace:
Solace PubSub+ message brokers efficiently move information between all kinds of applications, users and devices, anywhere in the world, over all kinds of networks. Solace makes its state-of-the-art PubSub+ messaging middleware technology available in three ways:
- Solace PubSub+ is a powerful message broker that runs on any computer in a virtual machine or a container.
- SolacePubSub+ Cloud is a managed messaging as a service (MaaS) offering that lets developers easily tap into the power of Solace PubSub+ without installing, maintaining or upgrading messaging software.
- Solace PubSub+ appliances route messages entirely in hardware for unparalleled capacity, performance and robustness, with the low TCO of a turnkey appliance.
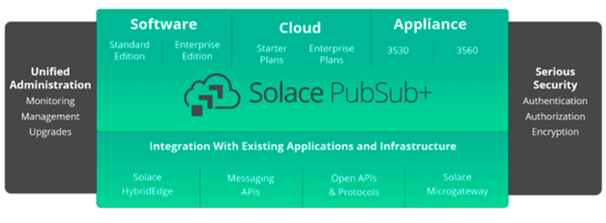
Solace PubSub+ message brokers—set up as any combination of software, hardware or cloud—give you an enterprise-grade digital backbone because they support the key features listed below:
- Support for all of the most popular cloud environments, public and private, IaaS and Paas, which combined with support for legacy non-cloud environments offers the only unified solution for hybrid cloud data movement.
- Support for many different transport and protocols; making Solace PubSub+ message brokers ideal data distribution platforms to connect to any application.
- Easy Integration with 3rd party products.
- Enterprise grade security to ensure that your infrastructure and information are protected at all times.
- High Reliability, including slow consumer control, fault tolerance, high availability and disaster recovery.
- High Performance in terms of message throughput, data transfer rates and latency.
Now we have an idea about Solace, let us dive into the integration of Solace and MuleSoft.
Steps to Integrate Solace and MuleSoft:
1) Navigate to https://console.solace.cloud/login link, and click on Sign Up to create an account in solace, where we will configure topics/queues.
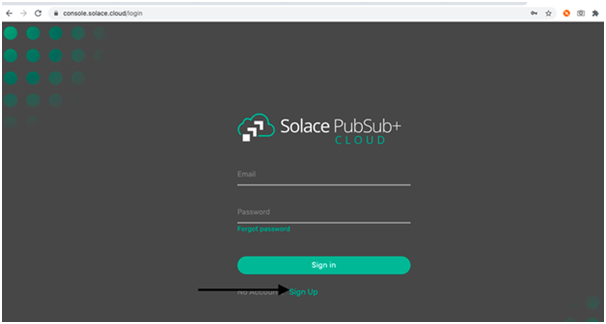
2) After clicking on Sign Up, the next screen will appear where you need to fill in all details and agree on the terms and conditions, and then click Sign Up which will create your account in Solace. This account is a trial account for 60 days.
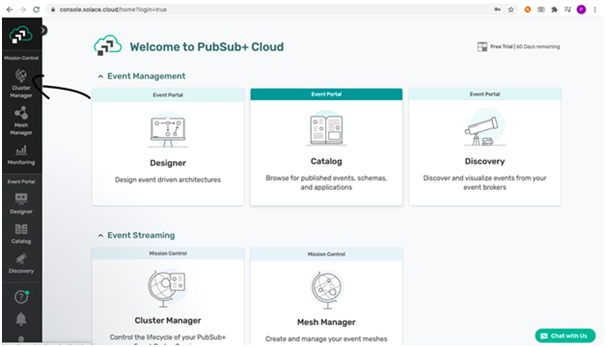
3) After successfully Sign-Up, the following screen will appear where you need to click on the “Cluster Manager“:
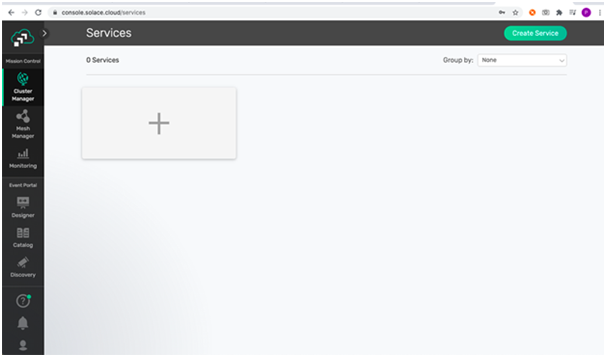
4) After that, you need to create a new service, which you can do by clicking on the “+“ icon.
5) For Service creation there are many things we need to select, the very first one is Service Type for that we have two options “Enterprise“ or “Developer“, as our account is trial, so we cannot leverage all the features. Hence, we need to select Developer in Service Type.

6) The second option is we need to “Select Cloud” where we need to deploy the service, we have four options over here: Amazon Web Services, Google Cloud, Microsoft Azure, and Private Cloud. We are choosing “Amazon Web Services“ as the cloud to deploy our service.
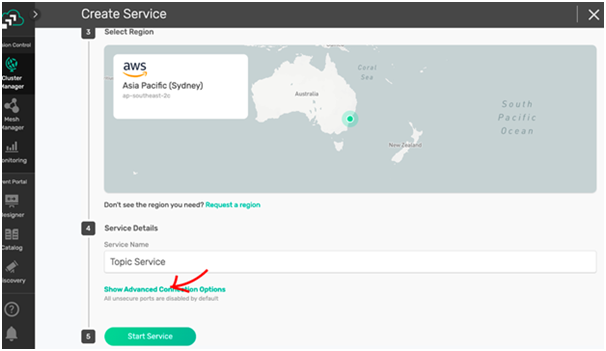
7) Then in the 3rd step, all the regions represented by green dots will appear where the Selected Cloud is having. You can select any of the regions by clicking on Green Dot.
8) Next, you can give the name of your service. Below the name of the service, there is “Show Advanced Connection options“
9) Click on the drop-down button corresponding to “Solace Messaging“ as below:

10) After that, enable all the ports for “Solace Messaging“ by checking the check box:
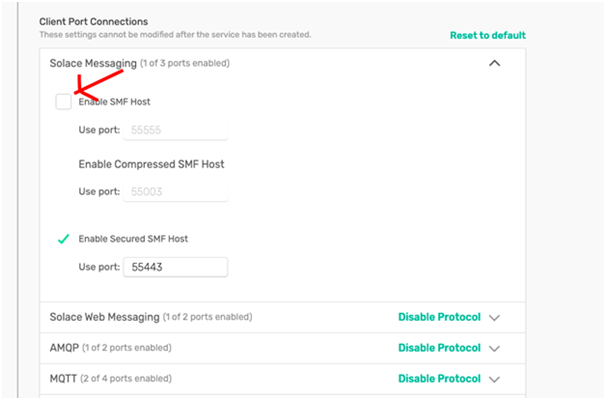
11) In the same way, Enable all the ports for Solace Web Messaging, AMQP, MQTT, and REST by checking the check box.
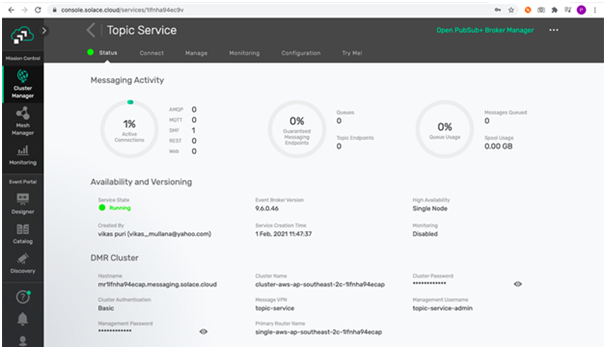
12) After that click on the “Start Service“ button, it may take some time while starting service. Once the service got started following screen will appear:
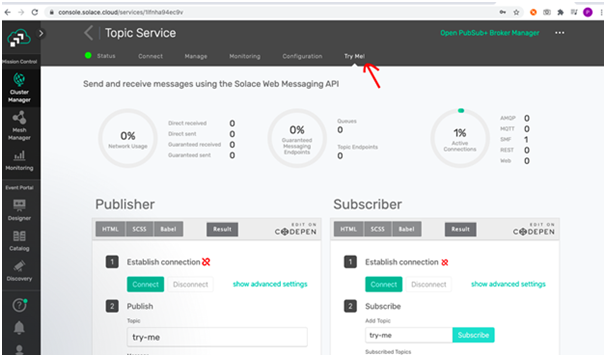
13) Click on the “Try Me!” tab as shown below:
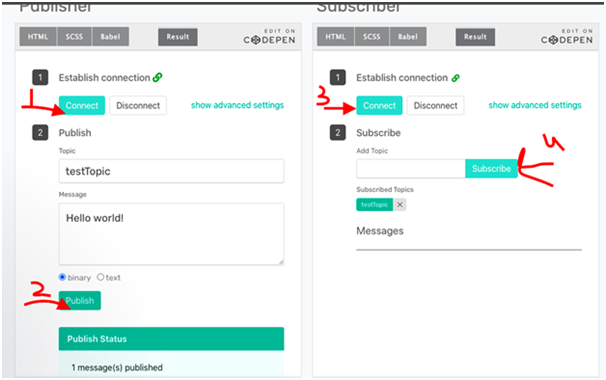
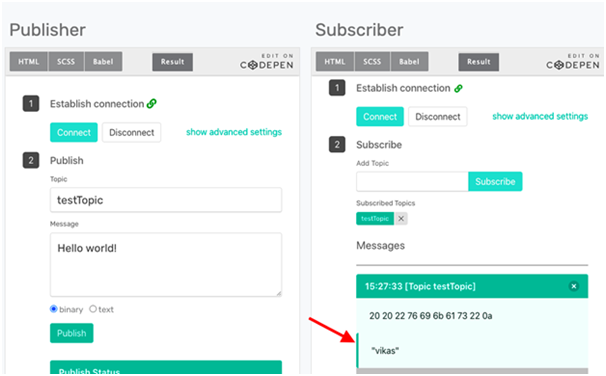
14) There you can see the Publisher and Subscriber section where you need to give the Topic name, here we replaced “try-me“ with “testTopic“, also the same we did in the Subscriber part. After this you need to make the connection of Publisher and Subscriber, please follow the exact sequence as mentioned below, so that we can see testTopic is published and connected, as well as we have subscribed to testTopic on the right with proper connection:
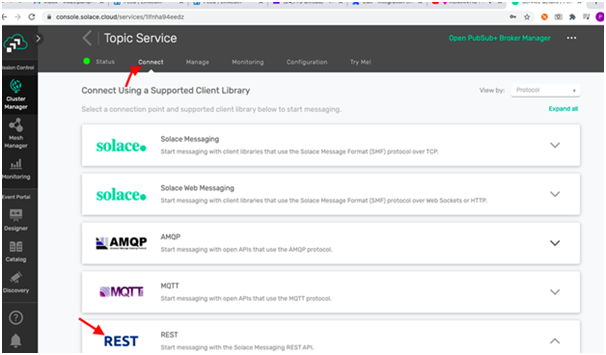
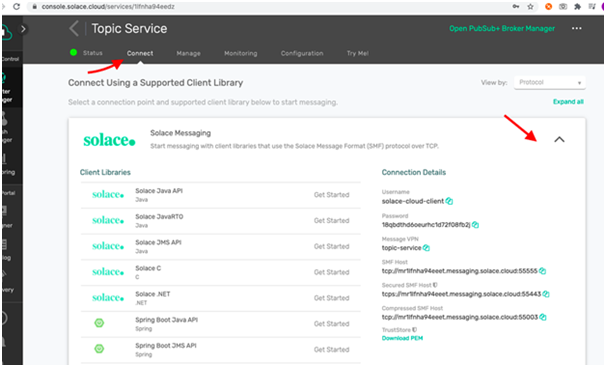
15) Click on the “Connect“ tab as shown below, which just expands the “REST“ part, and note down the username, password, and REST host which we will use while configuring the HTTP request component during implementation.
16) Expand solace message, note Username, Password, Message VPN, and SMF Host which will be used to configure the Listener.
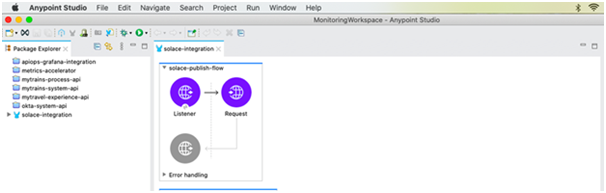
17) Now we are done with the Solace part, let us go for its integration on MuleSoft. Create a new Mule Project in AnyPoint Studio. Let us first focus on publishing to Topic part first, for this you need to create the below flow which will use HTTP Listener and HTTP Request component:
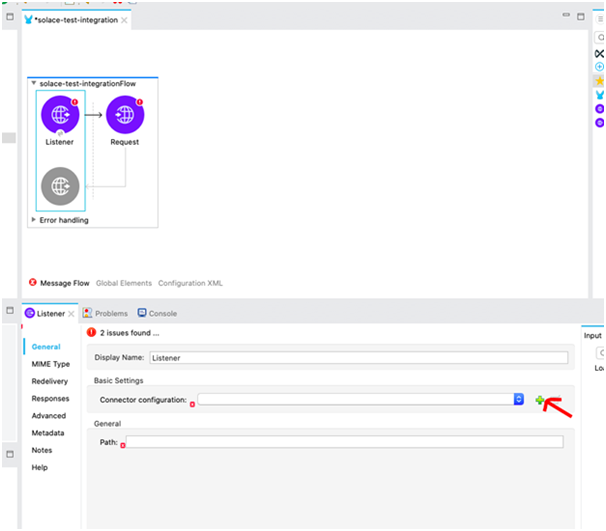
18) Click on the Listener component, after you need to click on the “+“ symbol to create a new configuration:
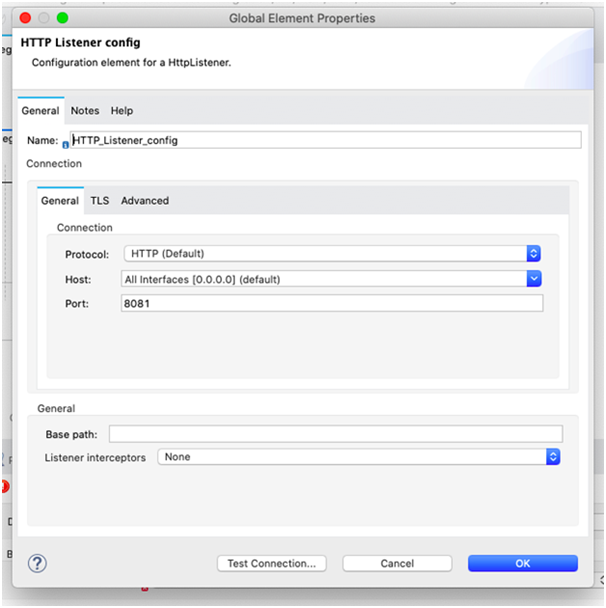
After clicking on. “+“ symbol, below screen, will appear where you need to give configuration name, host and port, I have given below names then click on “Ok“:
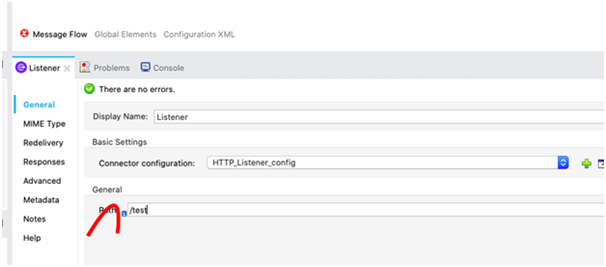
19) Then you need to provide a path, here I provided “/test“ as a path as shown below:
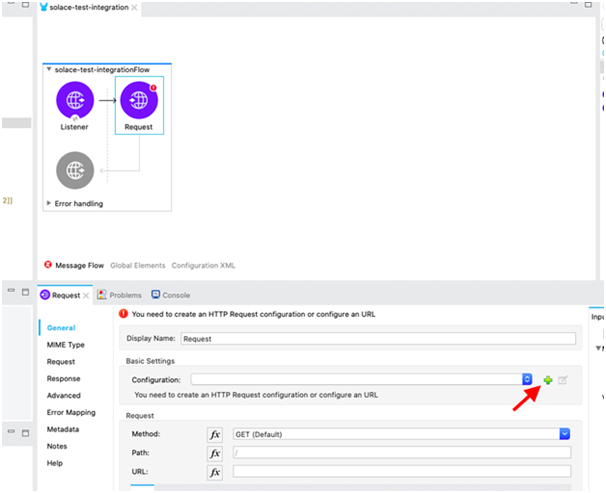
20) Now let us configure the “HTTP Request“ component, click on the HTTP Request component below screen will appear just click “+“ corresponding to the configuration:
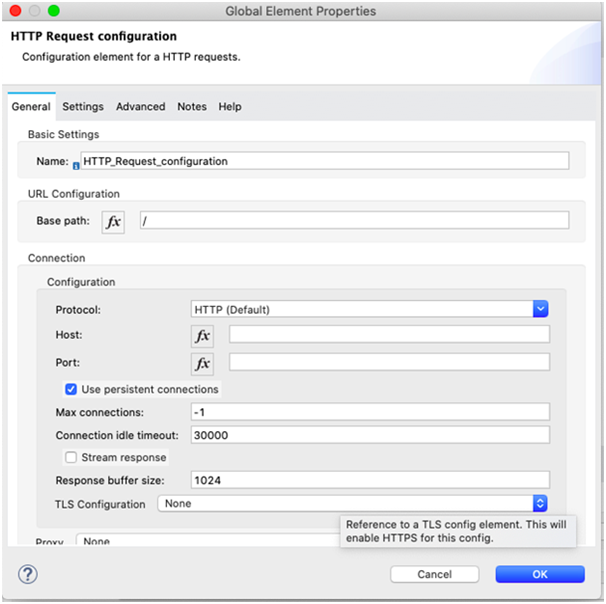
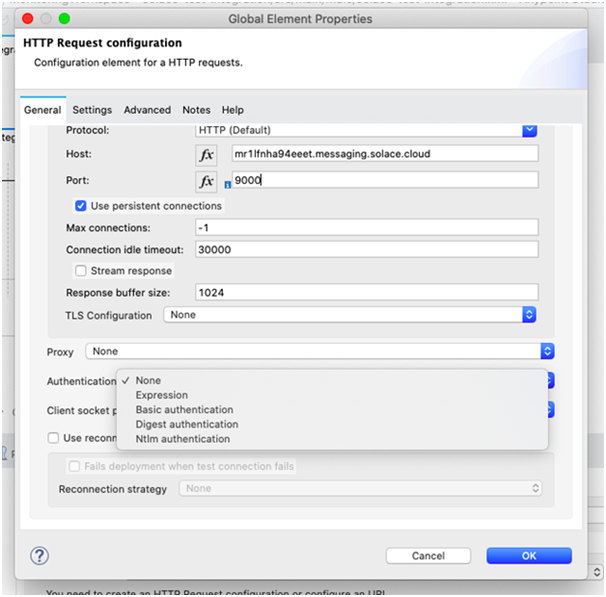
21) After clicking on “+“ corresponding to Configuration, the below screen will appear:
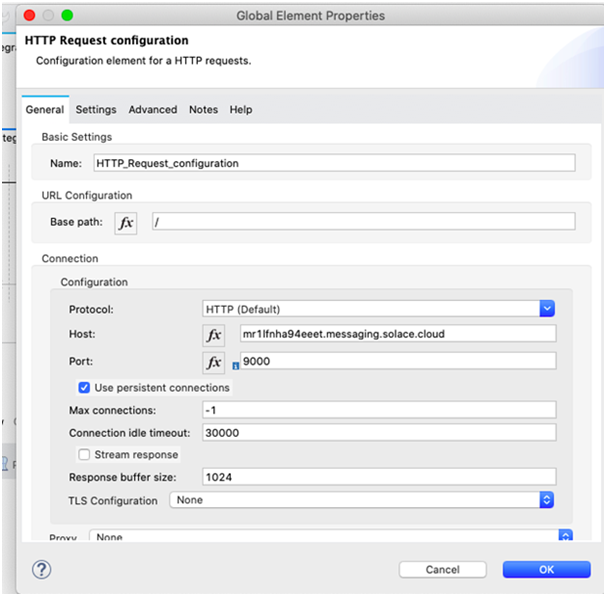
22) In Host and Port, fill with the values which we got from step 15. Something similar as below:
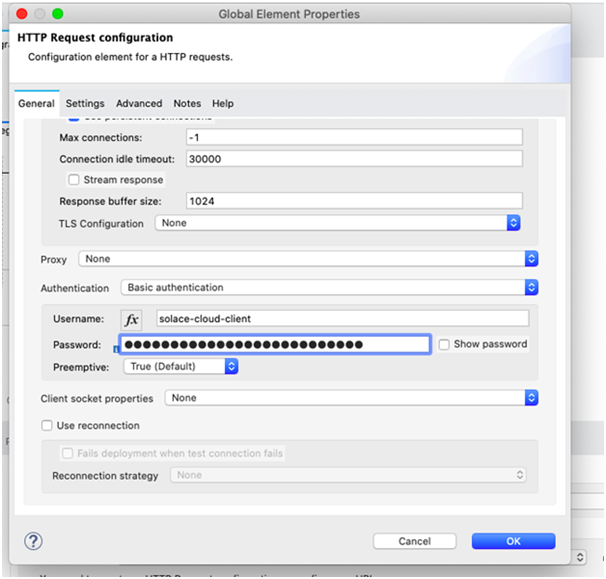
23) Scroll down the Configuration you will find Authentication from there, you choose Basic Authentication:
24) In the Username and Password, you can fill the user name and password which we get in Step 15, and then Click Ok.
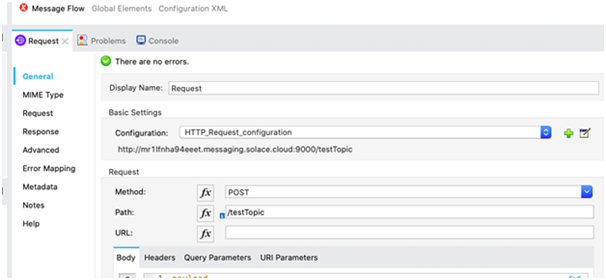
25) After the configuration is final, then we need to fill the following details in Request, in request method choose “POST“, and in the Path, we need to select what topic name we have given, so here in Path I mentioned “/testTopic“.
26) Now we are done with publisher flow, now let us create the Subscriber flow. In Anypoint Studio:
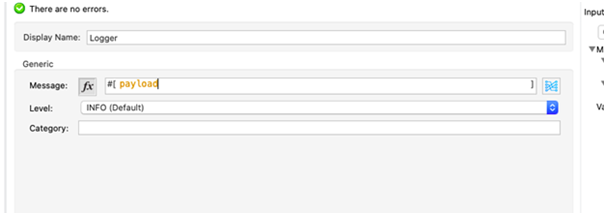
Here we have uses the “On New Message“ component of JMS and logger to log the payload.
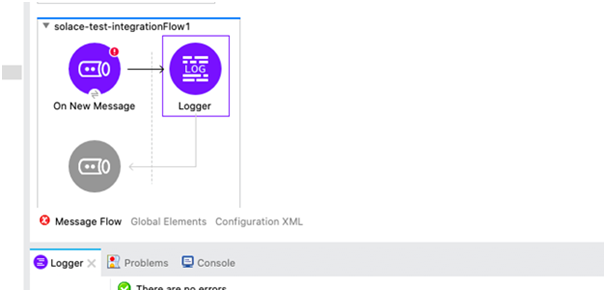
27) Click on the logger, and log the payload as below:
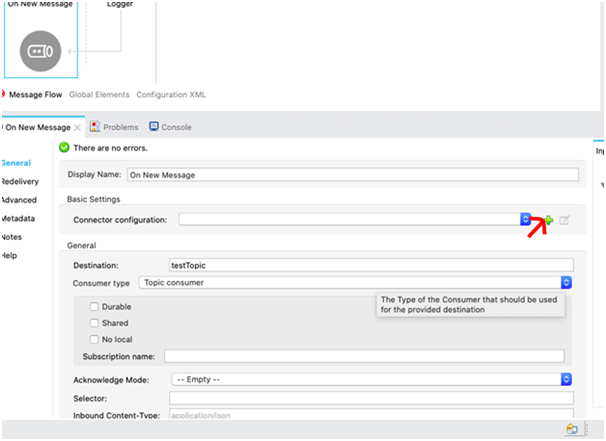
28) Now click the “On New Message“ component, in the Destination “testTopic“ as this is the name of Topic, and in the "Consumer type" choose “Topic consumer“ and in the "Number of Consumer" fill “1“.

29) After that click on the “+“ icon corresponding to the configuration:
30) After clicking on “+“ icon, following screen will appear:
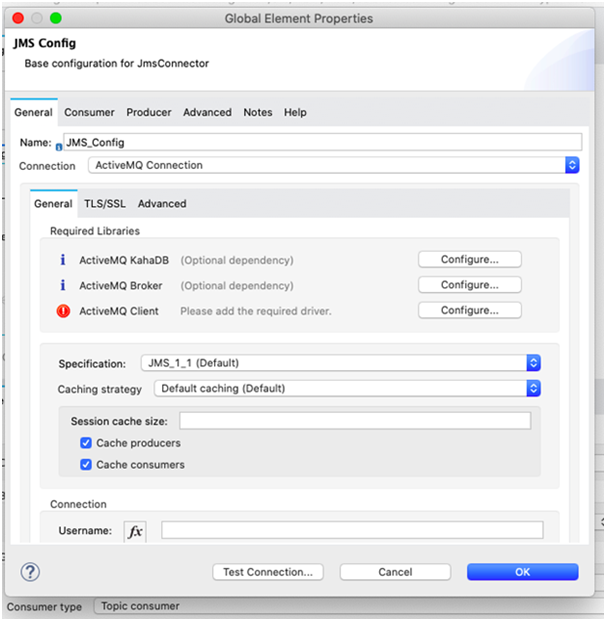
31) Now in the Connection field, choose “Generic Connection“:
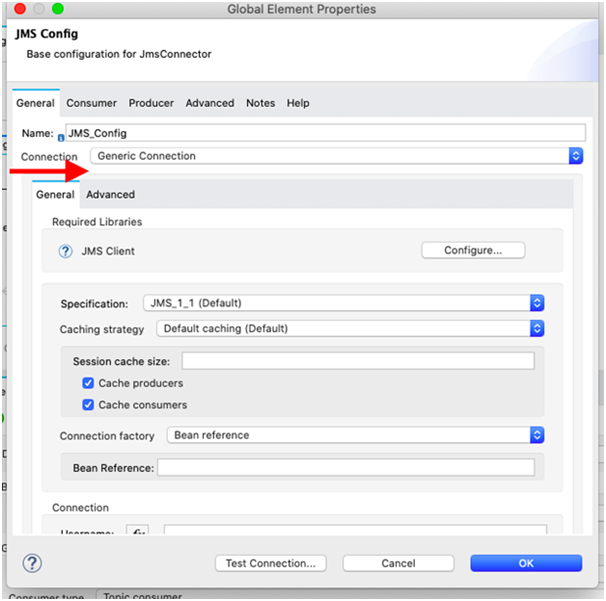
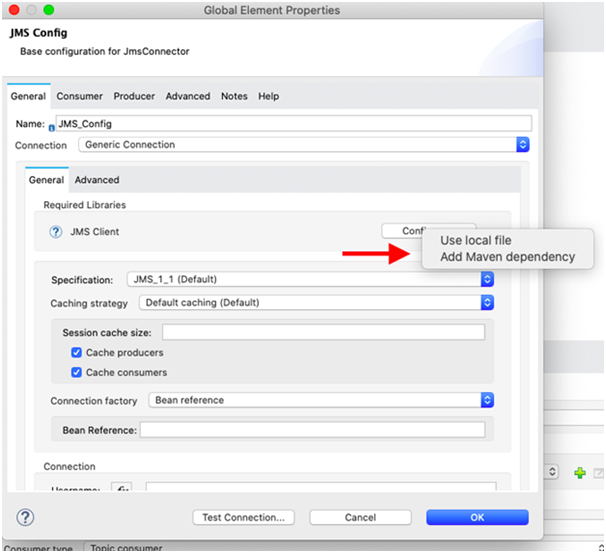
32) Click the “Configure“ button corresponding to “JMS Client“, then click on “Add Maven dependency“.
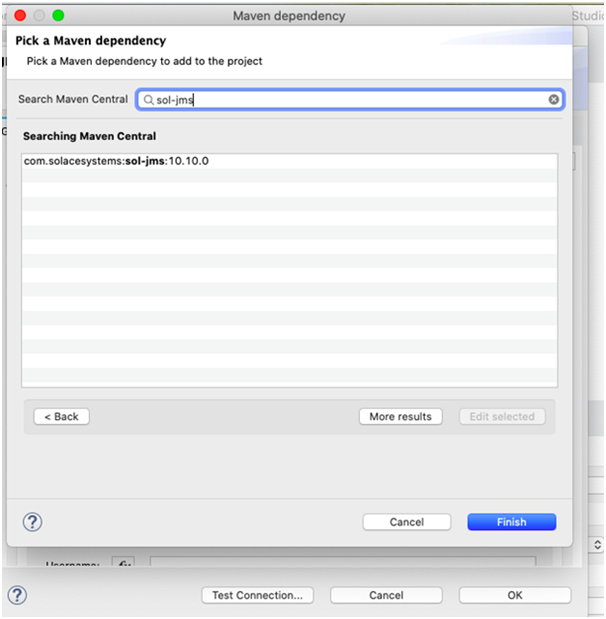
33) Now in the Search Maven Central, search for “sol-jms“ as shown below, then select sol-jms:10.10.0 and click Finish:
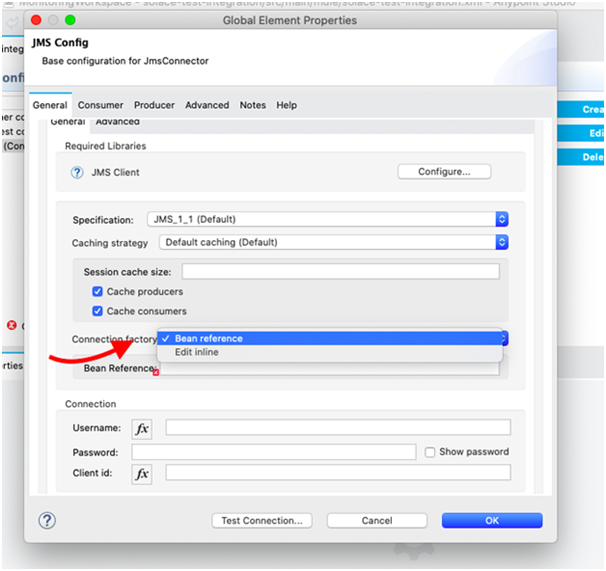
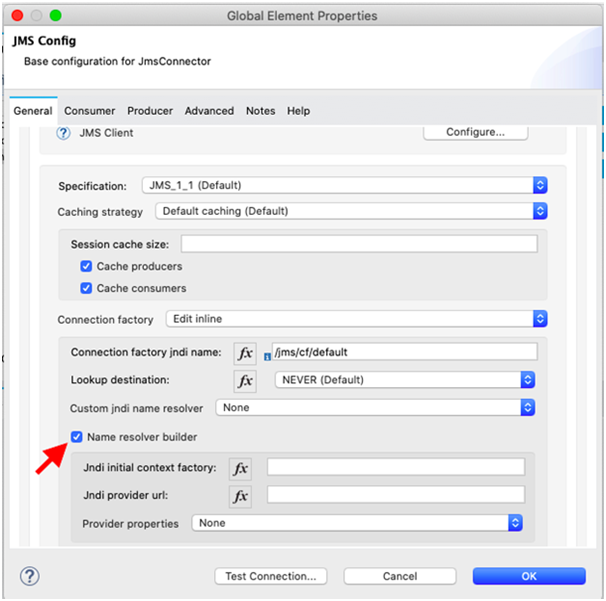
34) Now in Connection Factory, choose Edit Inline:
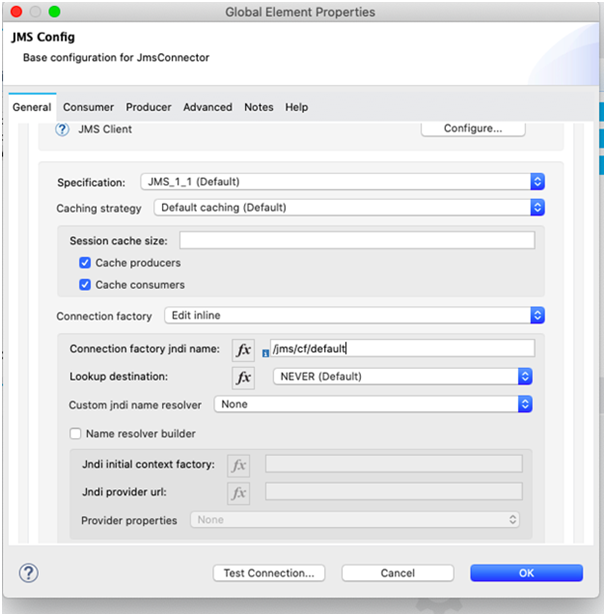
35) In the “Connection Factory jndi name”, write “/jms/cf/default“:
36) Now check the “Name resolver builder“, and fill the following details
Jndi intial context factory: com.solacesystems.jndi.SolJNDIInitialContextFactory
Jndi provider url: smf://username:password@smfurl
Now you can replace url username, password and smfurl with the details we got in Step 16.
eg: smf://solace-cloud-client:1or1gh58a8a6q0aul2h55r@mr1js1tiv0ygfj.messaging.solace.cloud:55555:
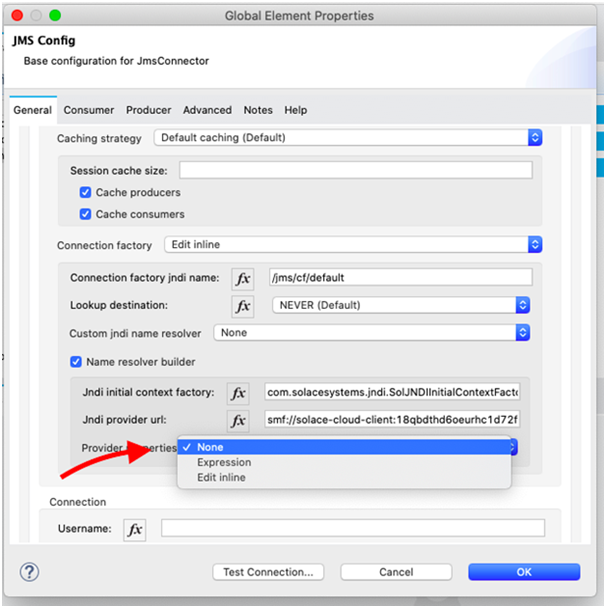
37) Select “Edit Inline“ in the Provider Properties:
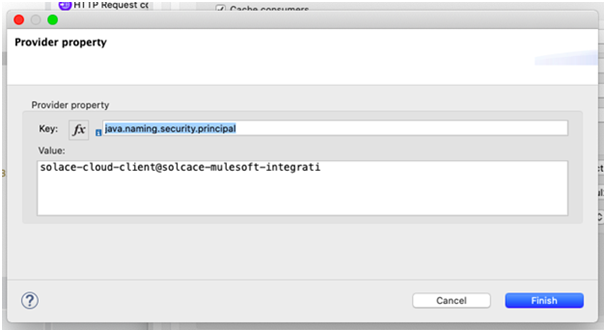
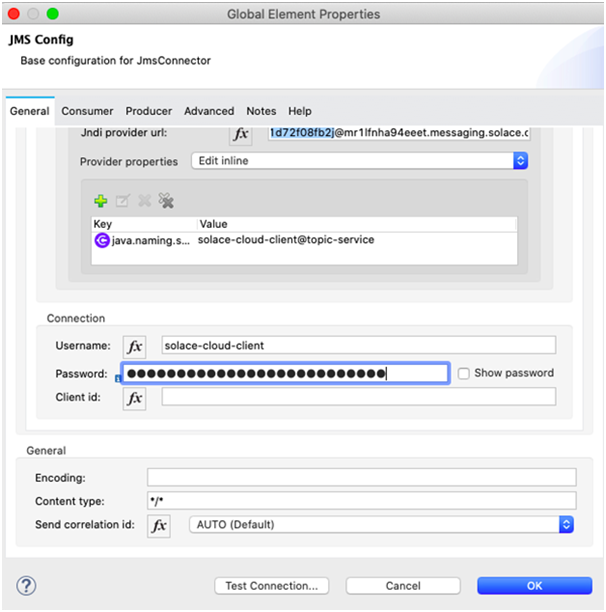
38) Then add key and value in key write java.naming.security.principal and in its value write username@vpn where you can replace the value of username and message VPN in Step 16.
39) Now in connection, fill the username and password which we got from Step 16, then click Ok.
40) Now you are done with Integration, start the mule application and hit the endpoint with some message :
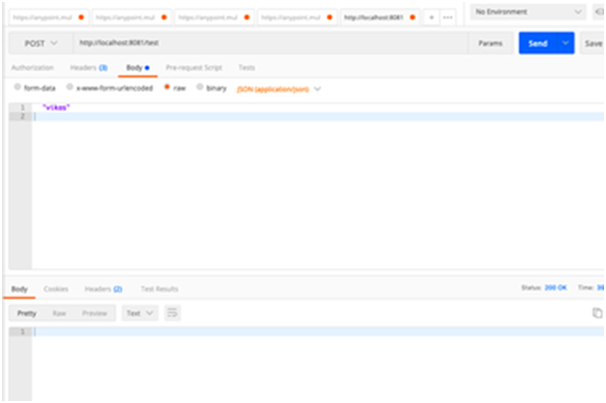
41) Like we have a message as “Vikas“ in the body, so go to the solace console there you can see your published message:
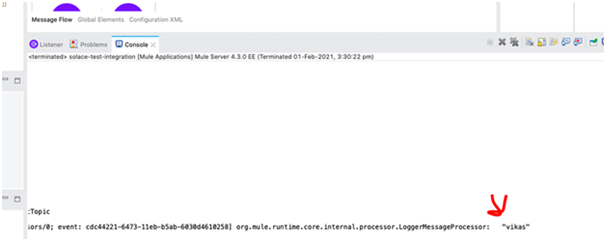
42) As we have also subscribed to a topic in our application, so the same message you can see in the logs of the mule application:
Conclusion
We hope that this walkthrough has been useful for you and that you now know how to best leverage the features of Solace through MuleSoft Integration.