In this step-by-step guide, we will learn how to integrate AWS API Gateway with the MuleSoft Anypoint Platform. We will create an API Gateway in AWS, connect it to a Mule API deployed on CloudHub, and then apply non-functional requirements such as rate limiting, IP allowlisting and IP denylisting, and logging.
Before starting the walkthrough, however, let’s briefly understand what an API gateway is.
An API gateway is an implementation component that sits between a client and a collection of backend services. It acts as a reverse proxy that accepts incoming API calls, validates requests, aggregates responses when required, and returns appropriate results to the client.
According to MuleSoft, an API gateway provides a dedicated orchestration layer on top of backend APIs and services, allowing teams to separate orchestration concerns from implementation logic.
Similarly, Amazon defines Amazon API Gateway as a fully managed service that allows developers to create, publish, maintain, monitor, and secure APIs at any scale. The service provides traffic management, CORS support, authorization, throttling, monitoring, and API versioning. To begin with, teams commonly use this integration approach when they require an external API gateway for Mule APIs.
Who Needs an External Gateway Provider for Mule APIs?
The MuleSoft Anypoint Platform includes API Manager as part of its control plane. While API Manager works well for many use cases, it requires a separate subscription beyond the trial period.
If a client’s budget does not support an API Manager subscription, teams must use an external gateway provider. In this guide, we use AWS API Gateway as the external gateway, although teams can also consider other third-party gateway providers.
In addition, using an API gateway helps enforce security and traffic policies consistently across services. The following steps explain how to implement AWS API Gateway MuleSoft integration from initial setup through policy enforcement and logging.
Step 1: Create an AWS Account
Start by creating an AWS account. AWS provides free-tier credits that are sufficient for initial testing and learning.
Step 2: Create an IAM User
To integrate with AWS services, you must create an IAM user.
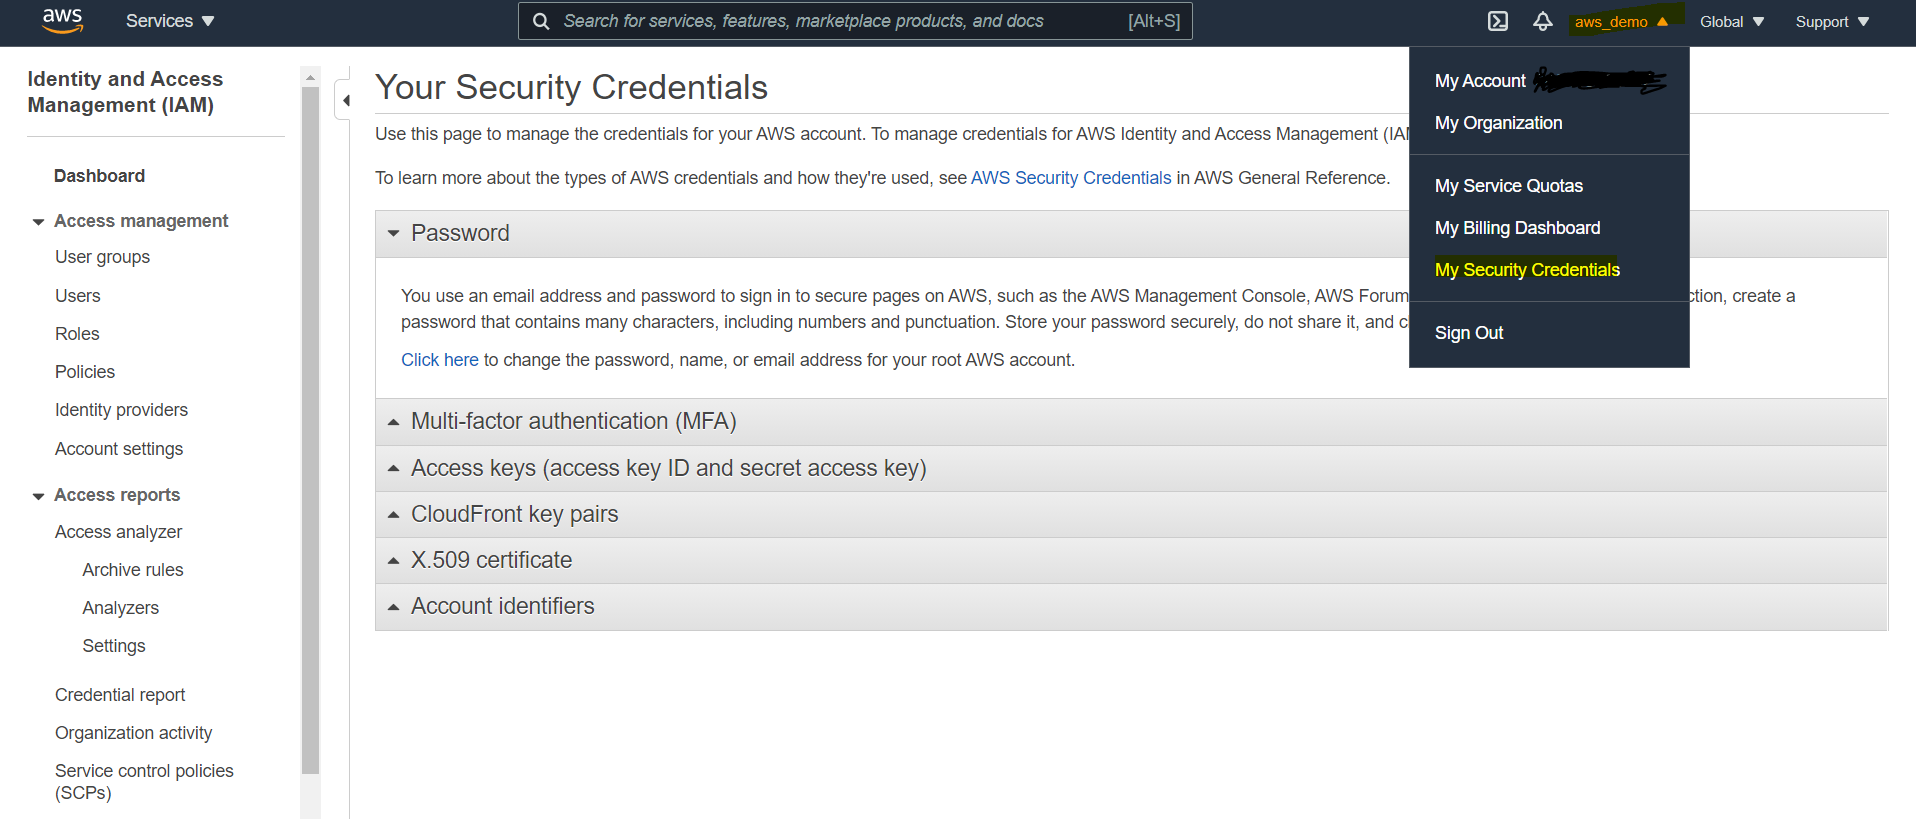
- Log in to the AWS Console
- Click the organization name in the top-right corner
- Select My Security Credentials
- From the left menu, click Users
- Create a new user
- Assign Administrator Access
- Download and securely store the access key ID and secret access key
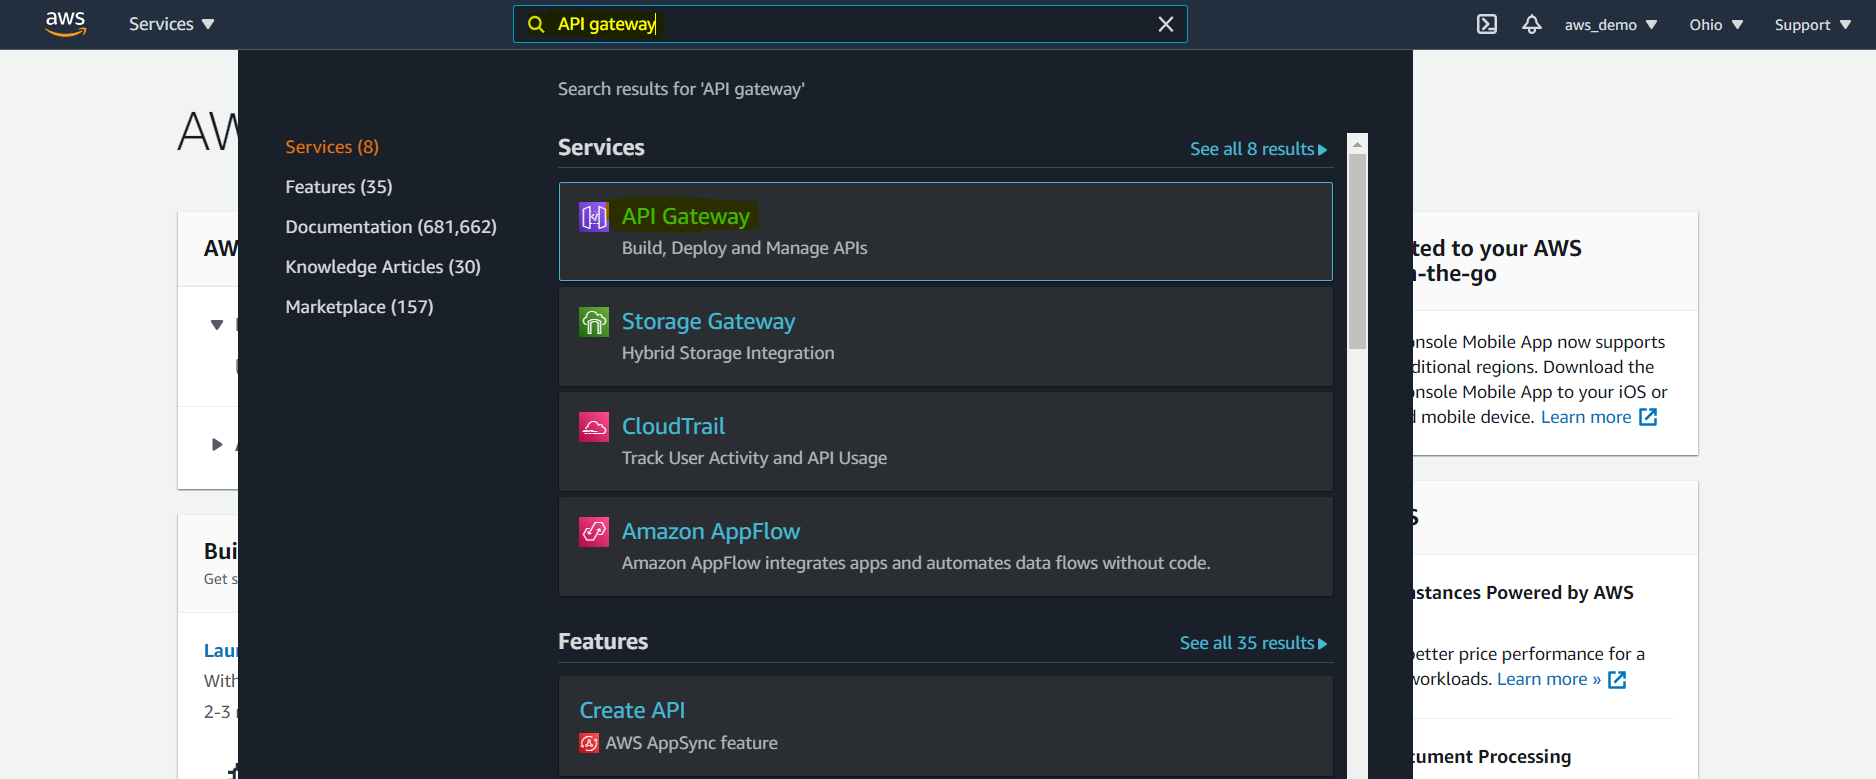
Step 3: Open AWS API Gateway
After that, from the AWS home screen:
- Type API Gateway in the search bar
- Select API Gateway from the results
This opens the main API Gateway console. As a result, AWS API Gateway becomes a practical choice for managing MuleSoft APIs at scale.
Step 4: Create a New API
Click Create API in the API Gateway console.
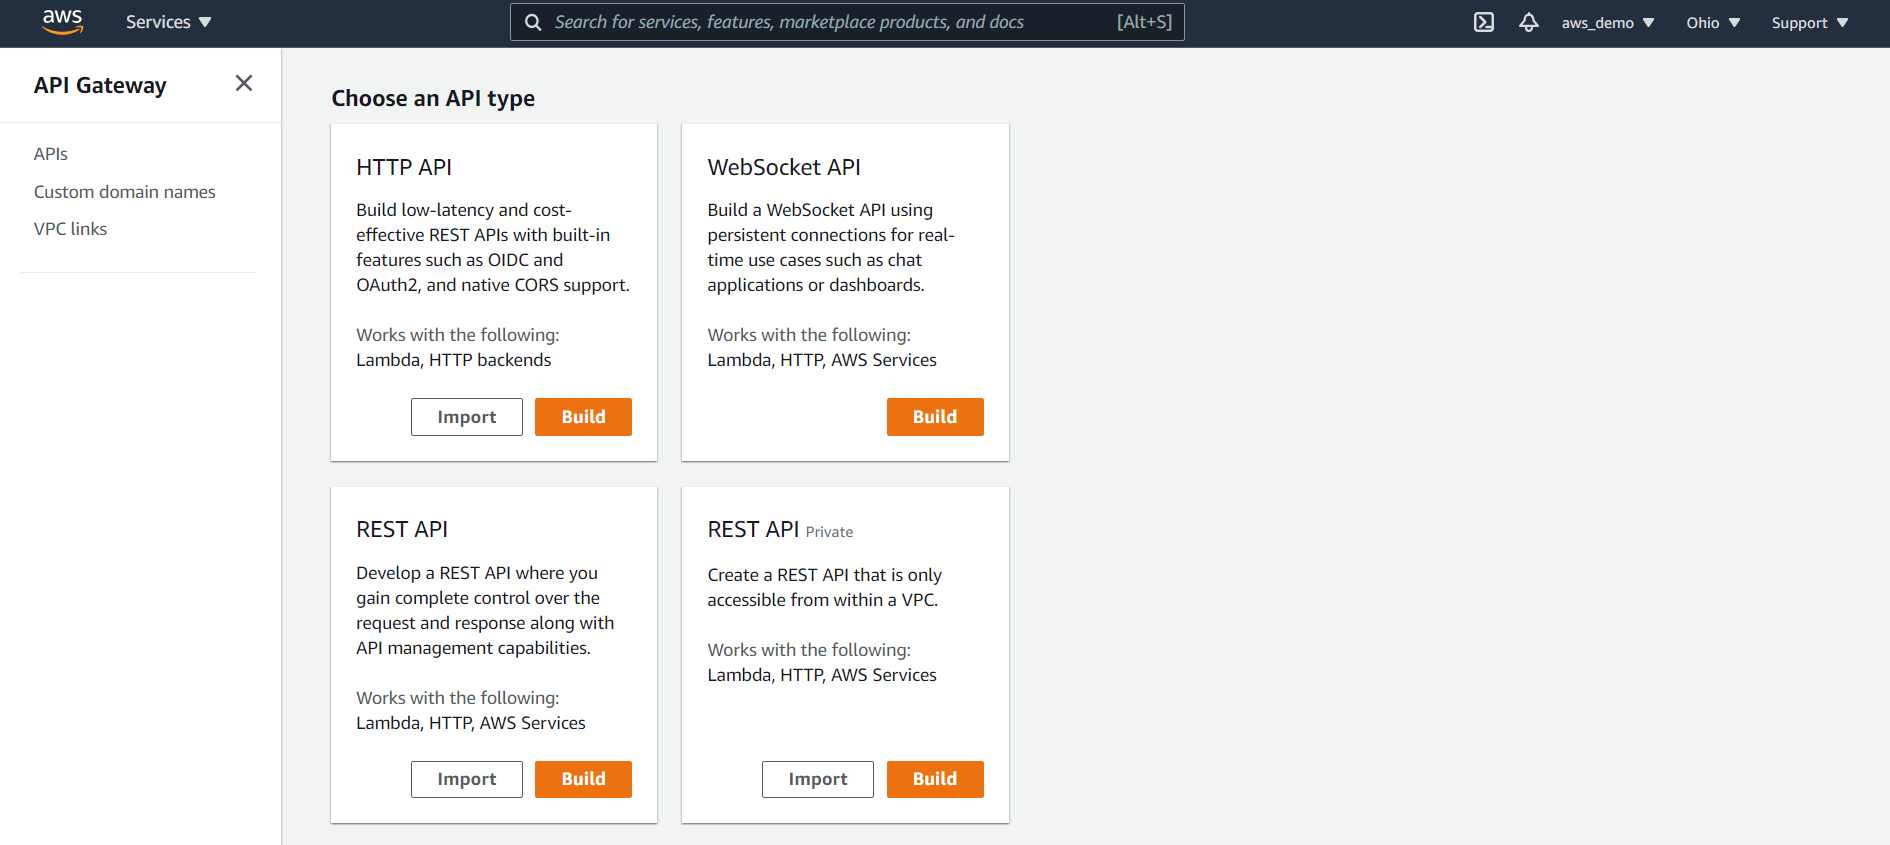
AWS displays multiple API types:
- HTTP API
- WebSocket API
- REST API
- REST API (Private)
For this walkthrough, select REST API and click Build.
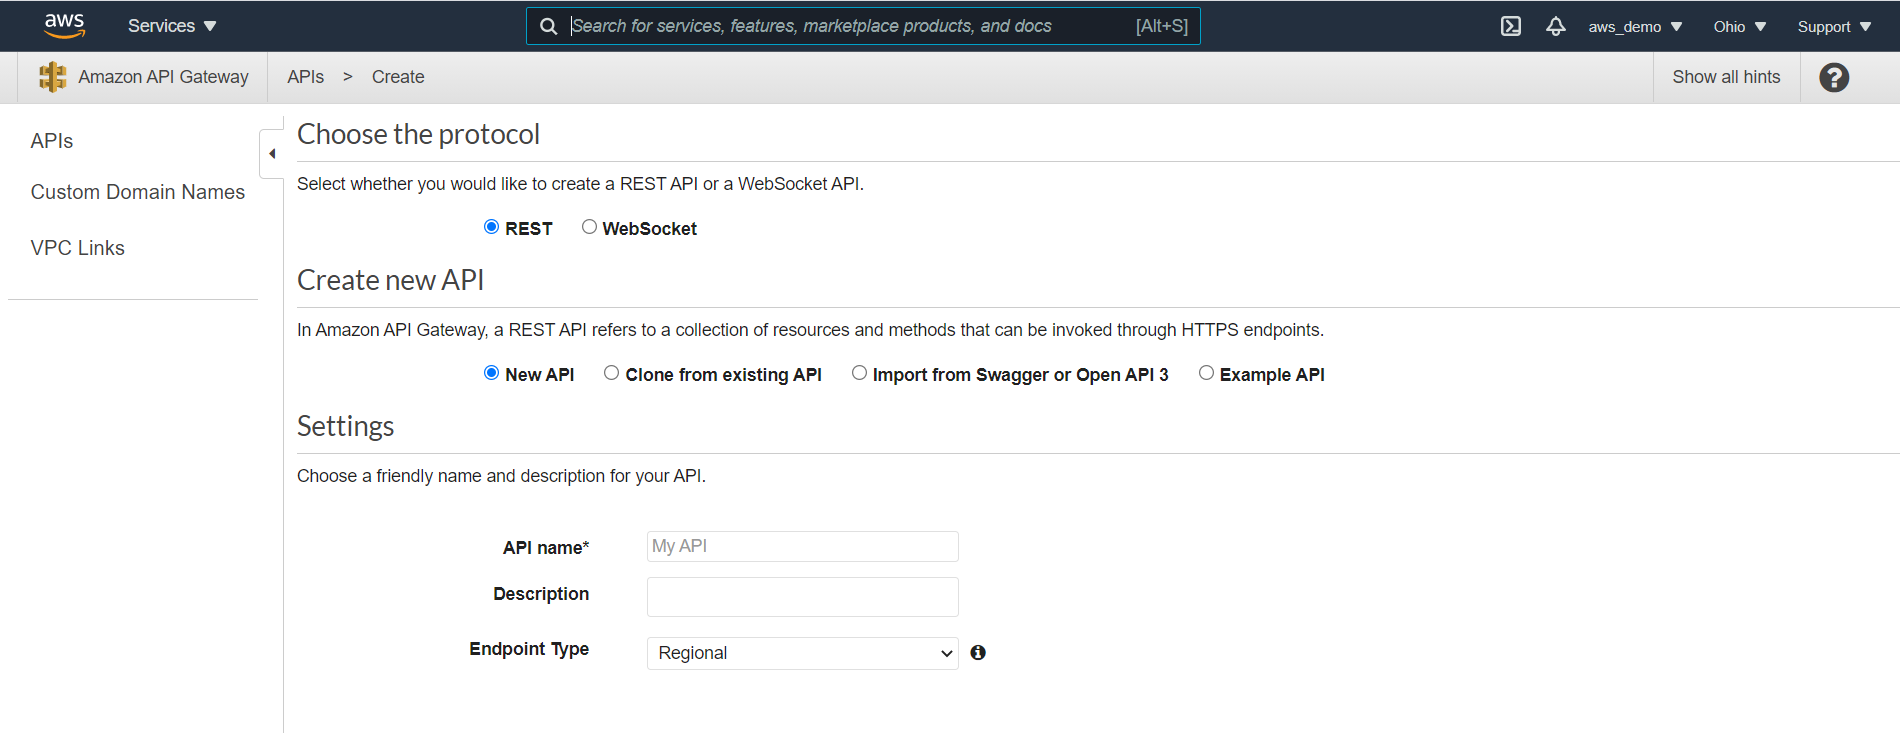
Step 5: Choose API Creation Method
At this point, on the next screen:
- Select REST
- Choose to create a new API
- Select the option to Import from OpenAPI (Swagger)

Step 6: Download MuleSoft API Specification
Meanwhile, prepare the MuleSoft API specification for import. Since this API Gateway will front a Mule API, proceed as follows:
- Navigate to Anypoint Exchange
- Open the published Mule API specification
- Download the RAML as an OpenAPI (OAS) specification
- Confirm the file is downloaded as a
.jsonfile
Step 7: Import the OpenAPI Specification
In the API Gateway console:
- Select the downloaded OpenAPI
.jsonfile - Upload the file using the import option
Step 8: Review Imported Swagger Definition
Once uploaded, AWS then displays the Swagger definition.

Step 9: Select Endpoint Type
AWS provides three endpoint types:
- Regional
- Edge-Optimized
- Private
For this walkthrough:
- Select Regional
Click Import to complete API creation.
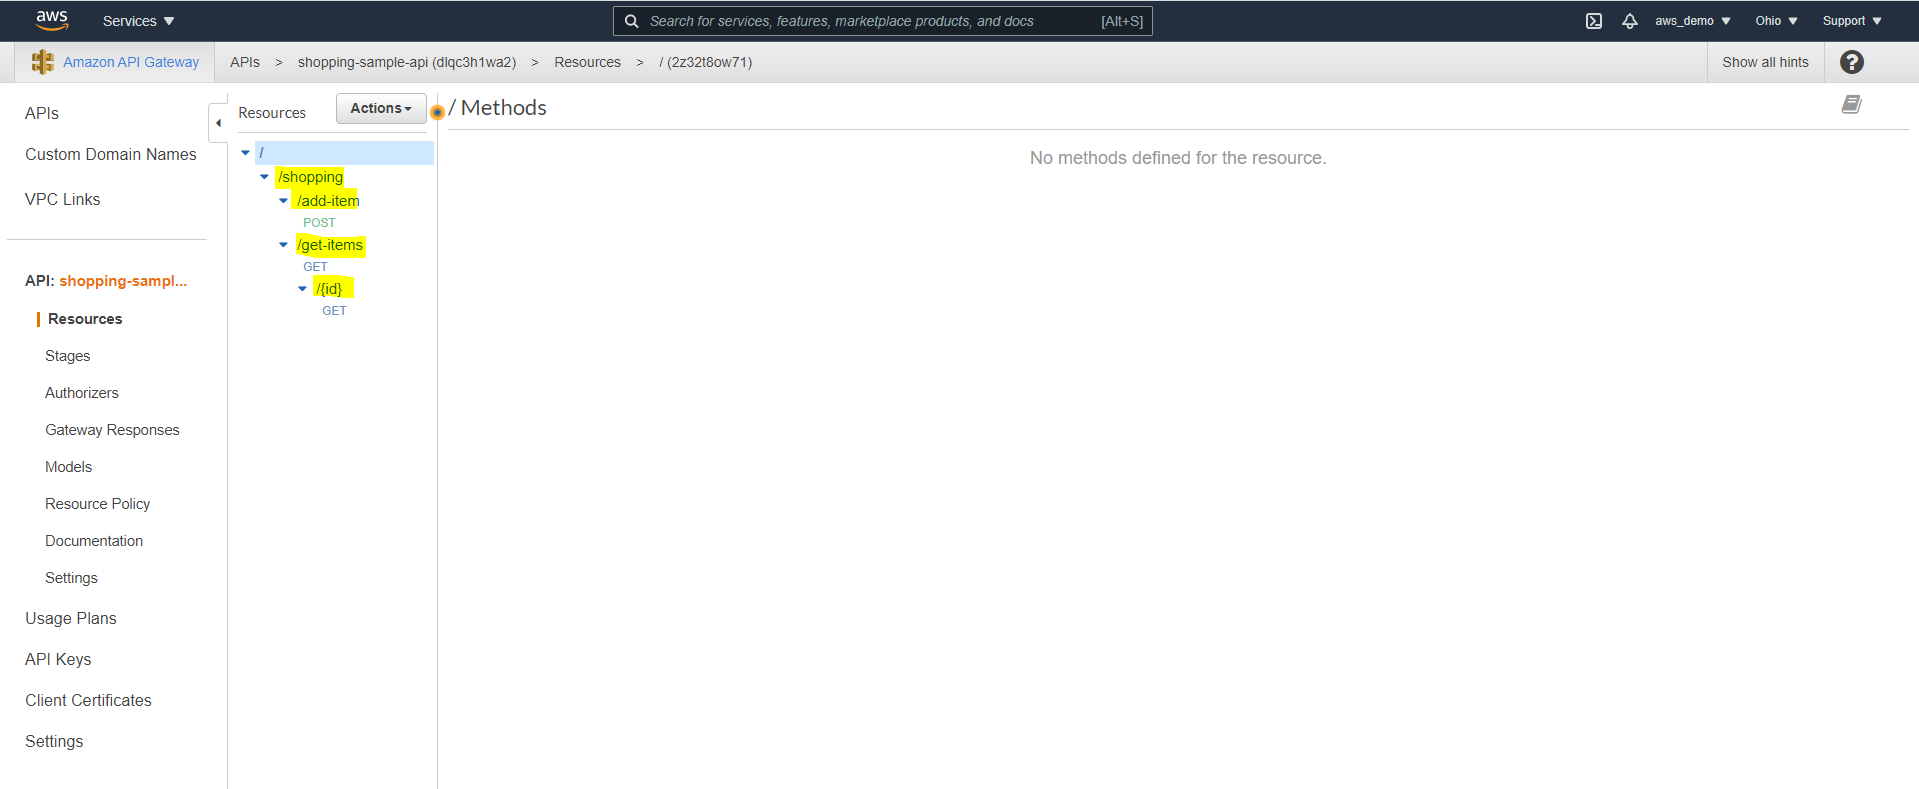
Step 10: Review Generated Resources and Methods
After completing the import, review the following:
- Review the automatically generated resources
- Verify that all endpoints and HTTP methods are listed
Step 11: Select a Method for Integration
Following this, select a specific resource method for backend integration.
- Click on any resource
- Select the corresponding HTTP method
Step 12: Choose Integration Type
At this stage, AWS provides multiple integration options to connect backend services.
- HTTP
- HTTP Proxy
- Lambda
- AWS Service
- VPC Link
For this guide:
- Select HTTP integration

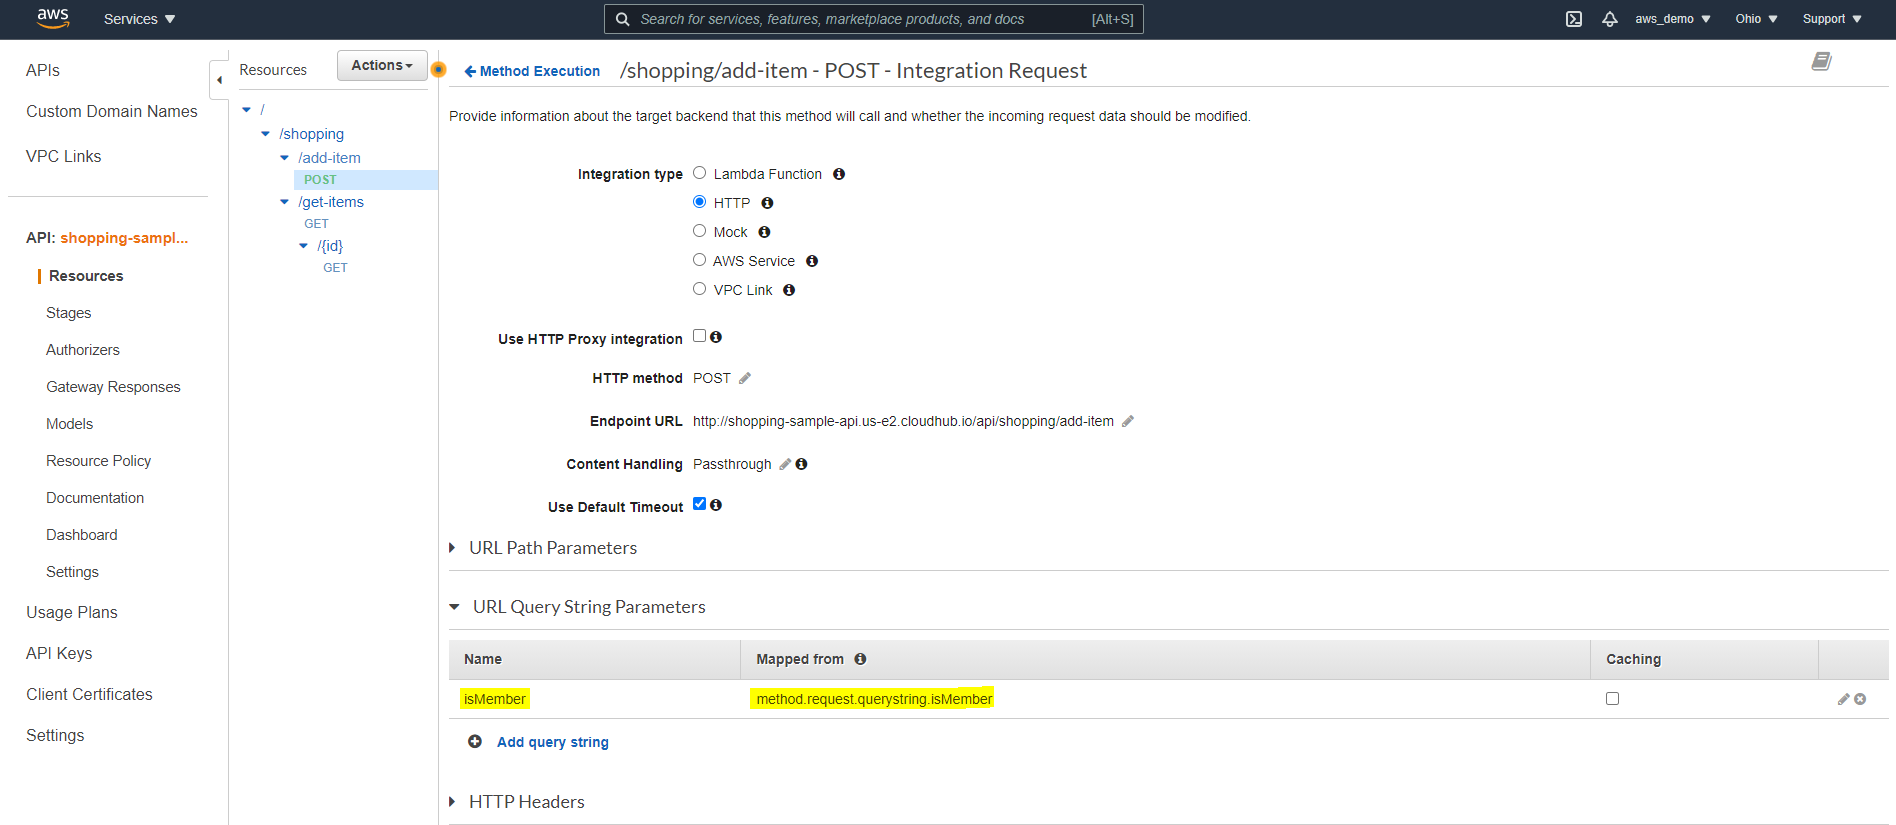
Step 13: Configure Integration Endpoint
Once the integration type is selected, the Mule API endpoint must be configured.
- Enter the deployed Mule API CloudHub endpoint
- Select the appropriate HTTP method
- Review Content Handling options if binary or text transformation is required
Click Save.
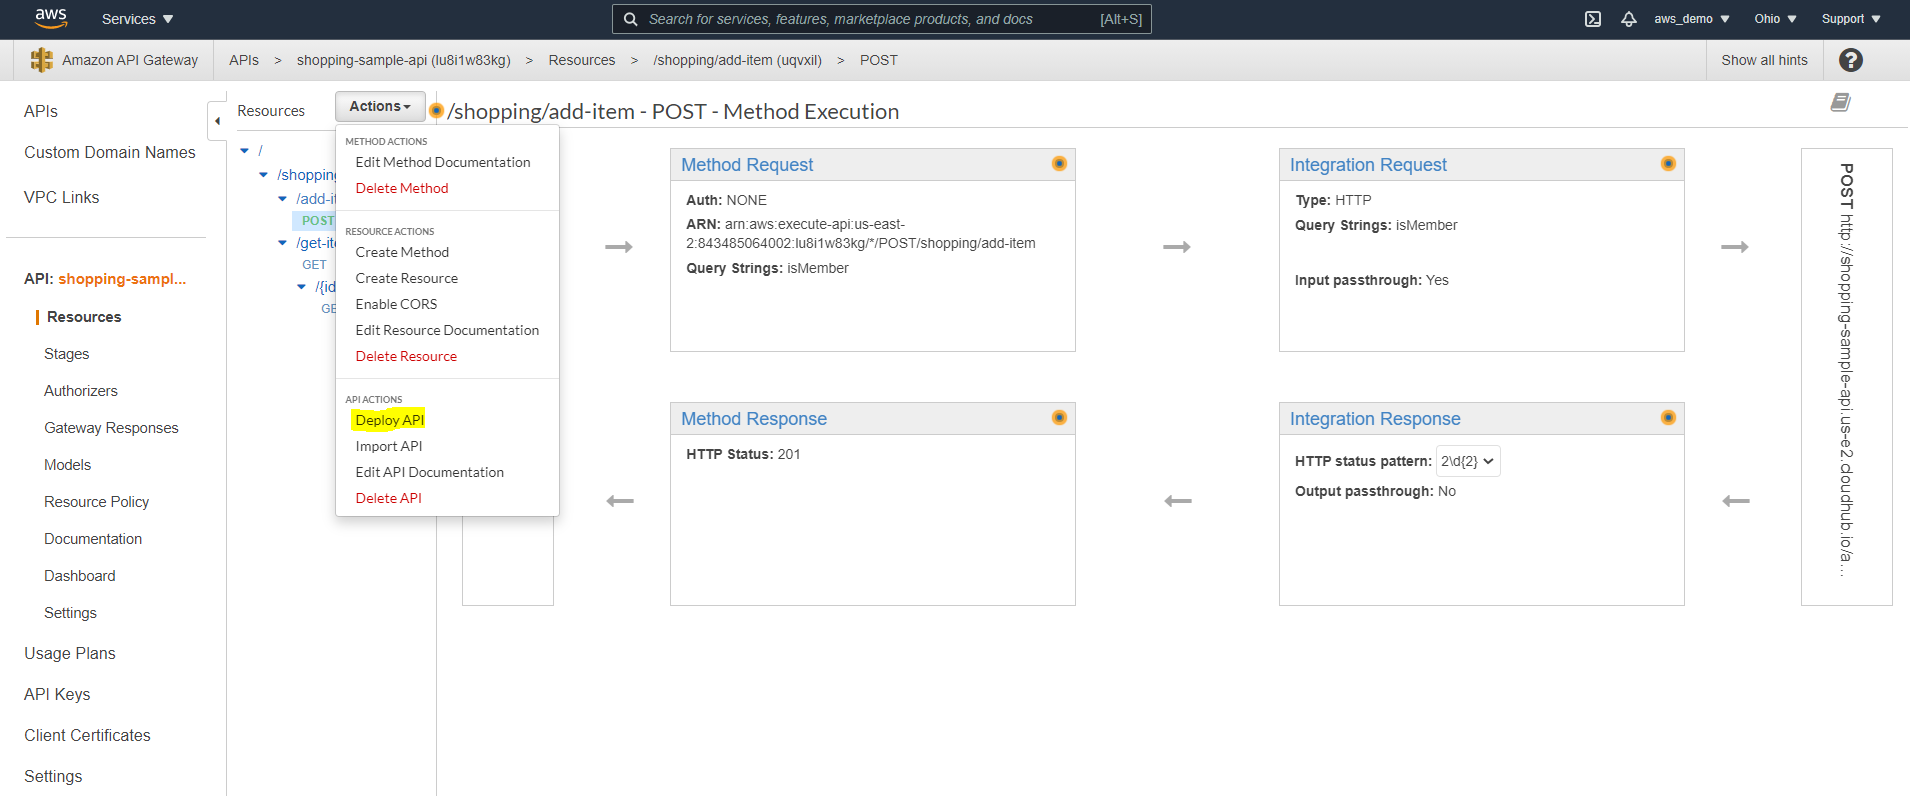
Step 14: Review API Execution Flow
After saving the configuration, the complete request flow should be reviewed
- Method Request
- Integration Request
- Integration Response
- Method Response
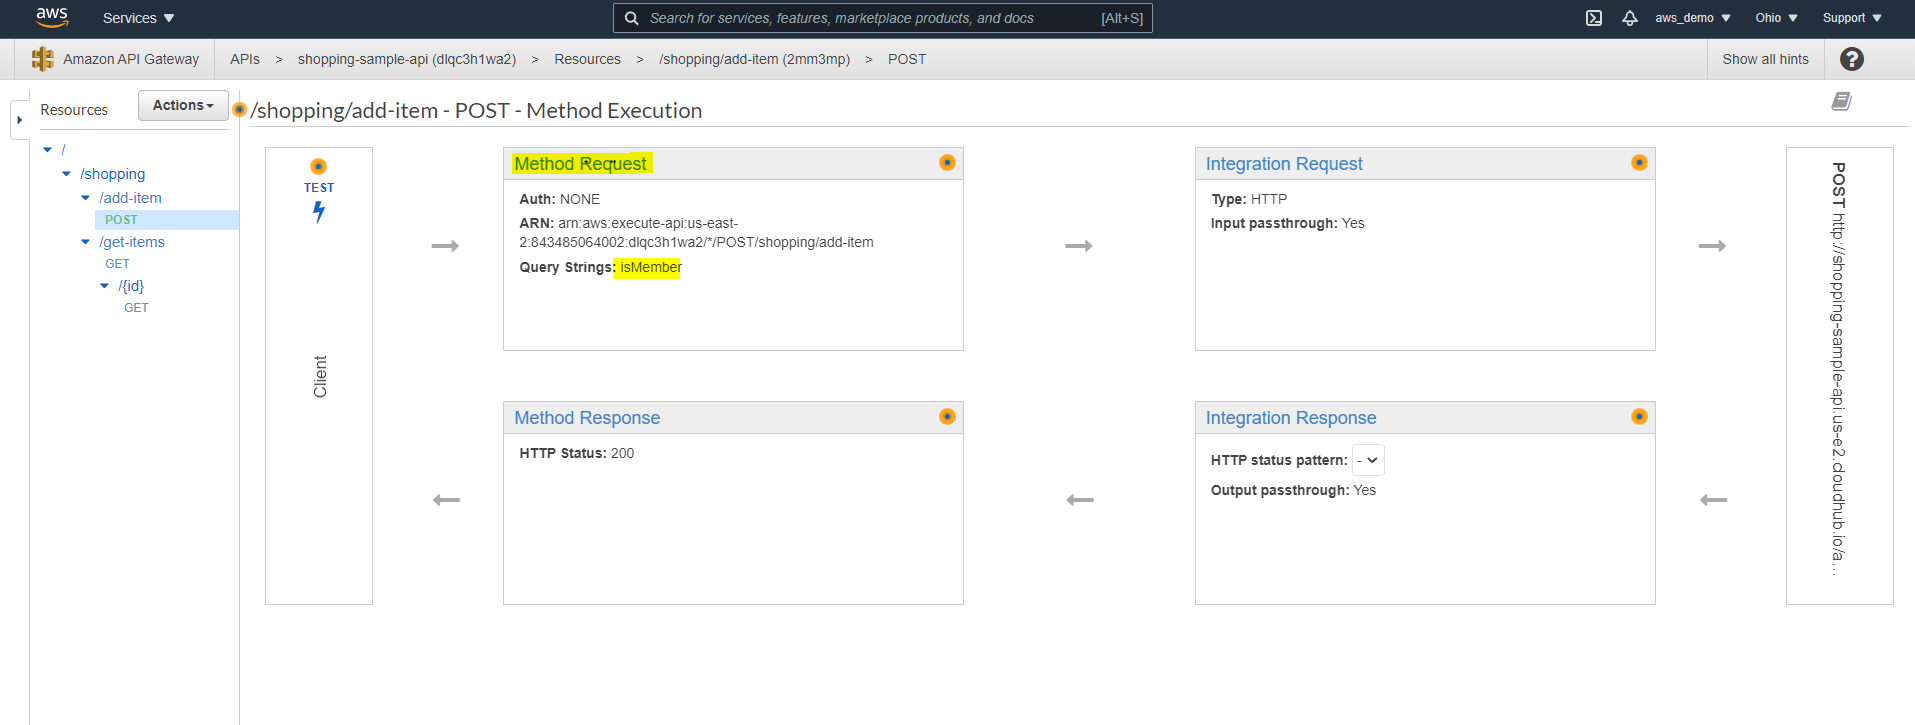
Step 15: Configure Integration Request Parameters
- Navigate to Integration Request
- Manually add query parameters defined in the RAML specification
In this way, API Gateway can correctly forward client parameters to MuleSoft.
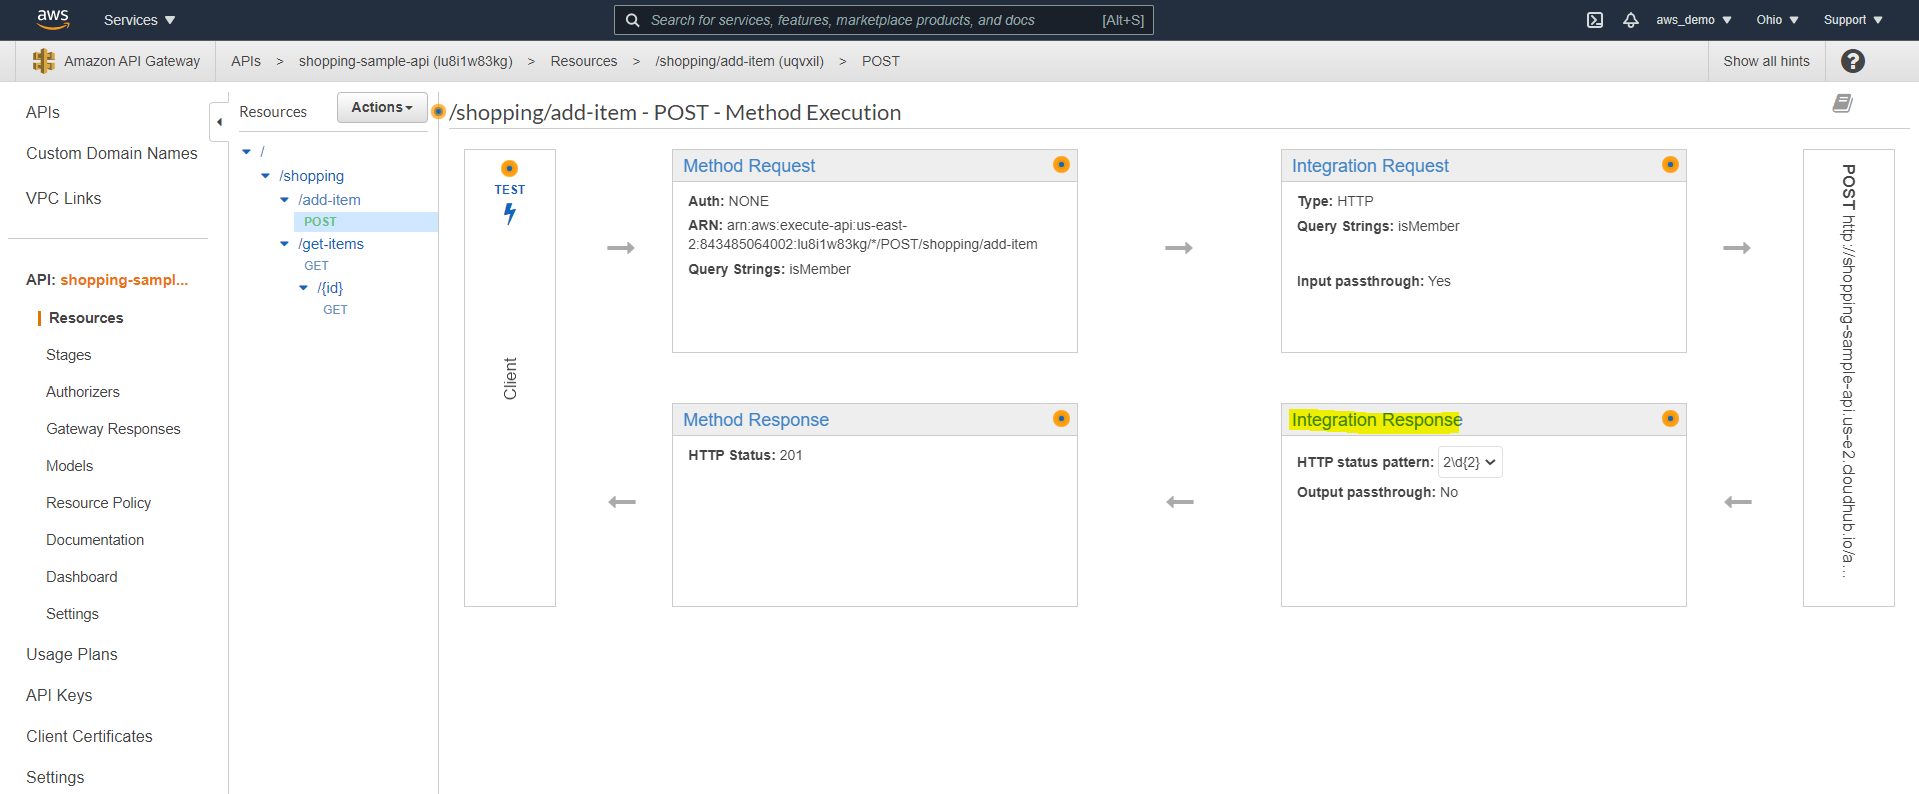
Step 16: Configure Integration Response Status Codes
By default, only successful responses are enabled, so additional codes must be configured.
- Add regex mappings for additional status codes such as 400 and 500
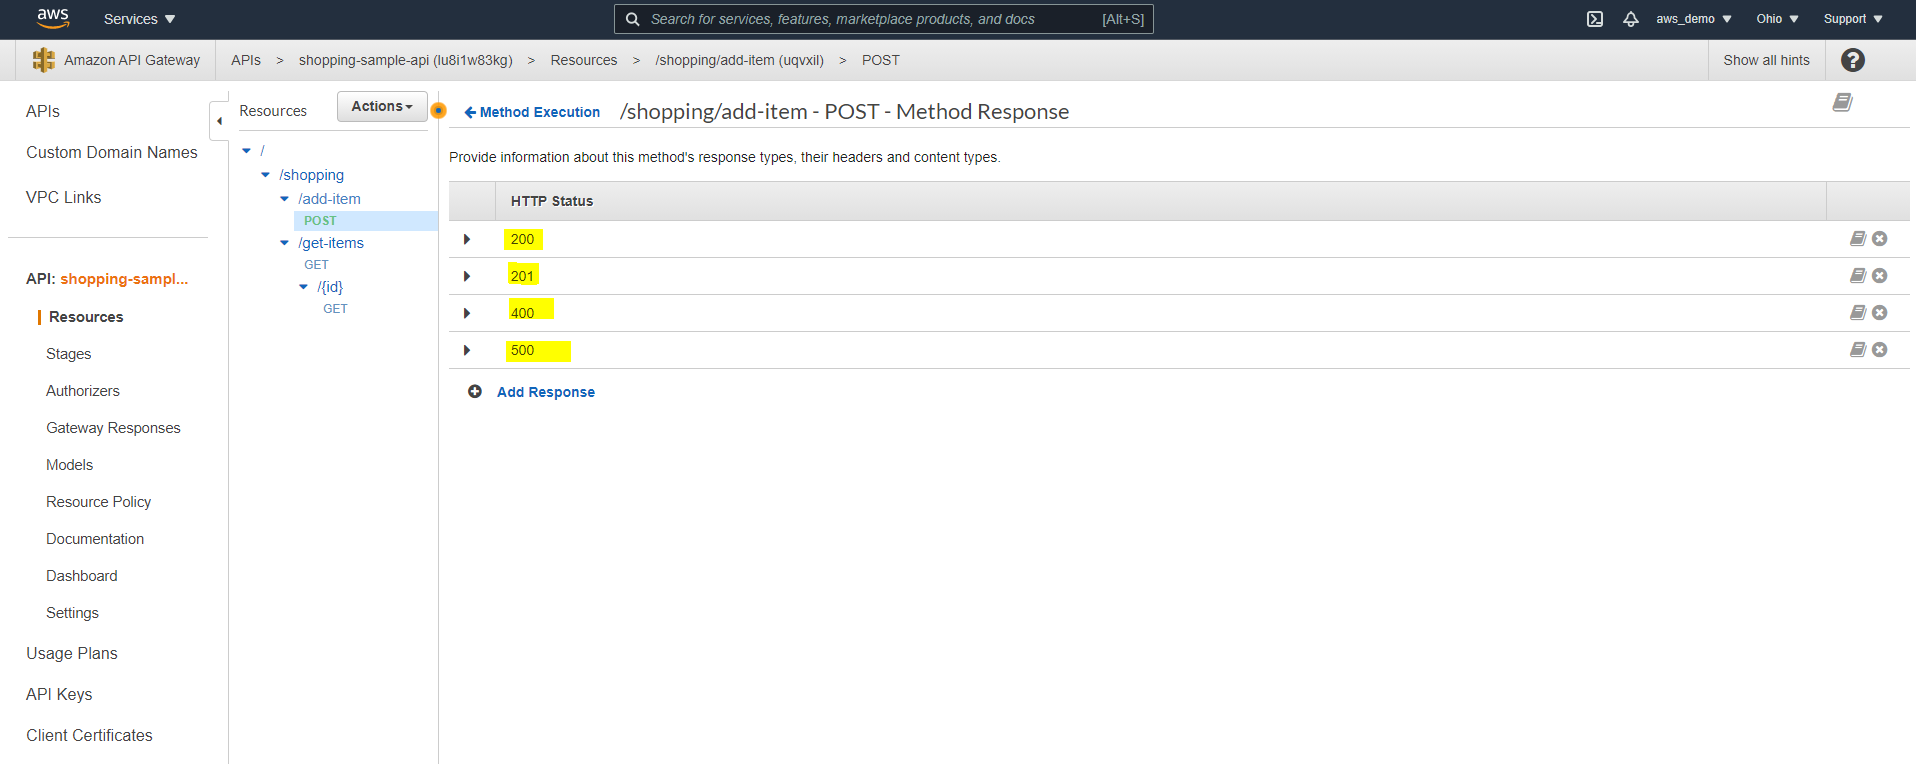
Step 17: Configure Method Response Status Codes
Correspondingly, method responses must match the configured integration responses.
- Navigate to Method Response
- Add the same status codes configured in Integration Response
Step 18: Test the API Gateway
At this point, the API Gateway can be tested to confirm successful integration.
Click Test in the client section
Execute the API request
Step 19: Deploy the API Gateway
To make the API publicly accessible:
- Click Deploy API
- Create a new deployment stage such as dev, test, or prod
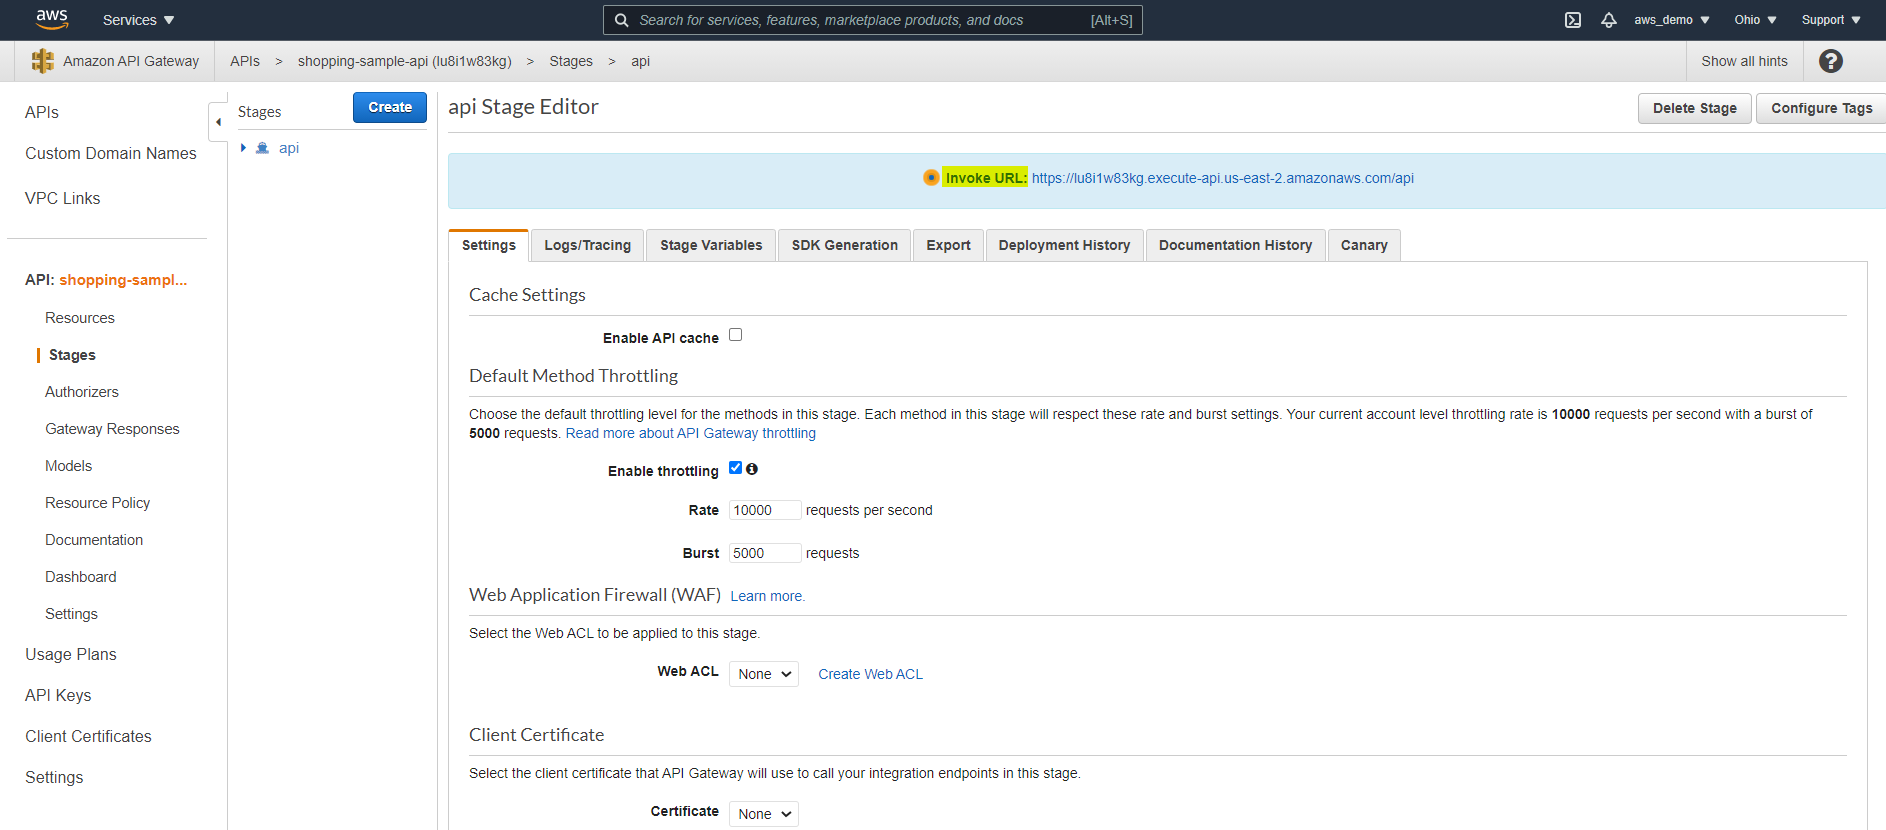
Step 20: Access the Deployed API URL
After deployment, the generated endpoint URL becomes available for use.
- Copy the generated API Gateway URL
- Test it using Postman or ARC
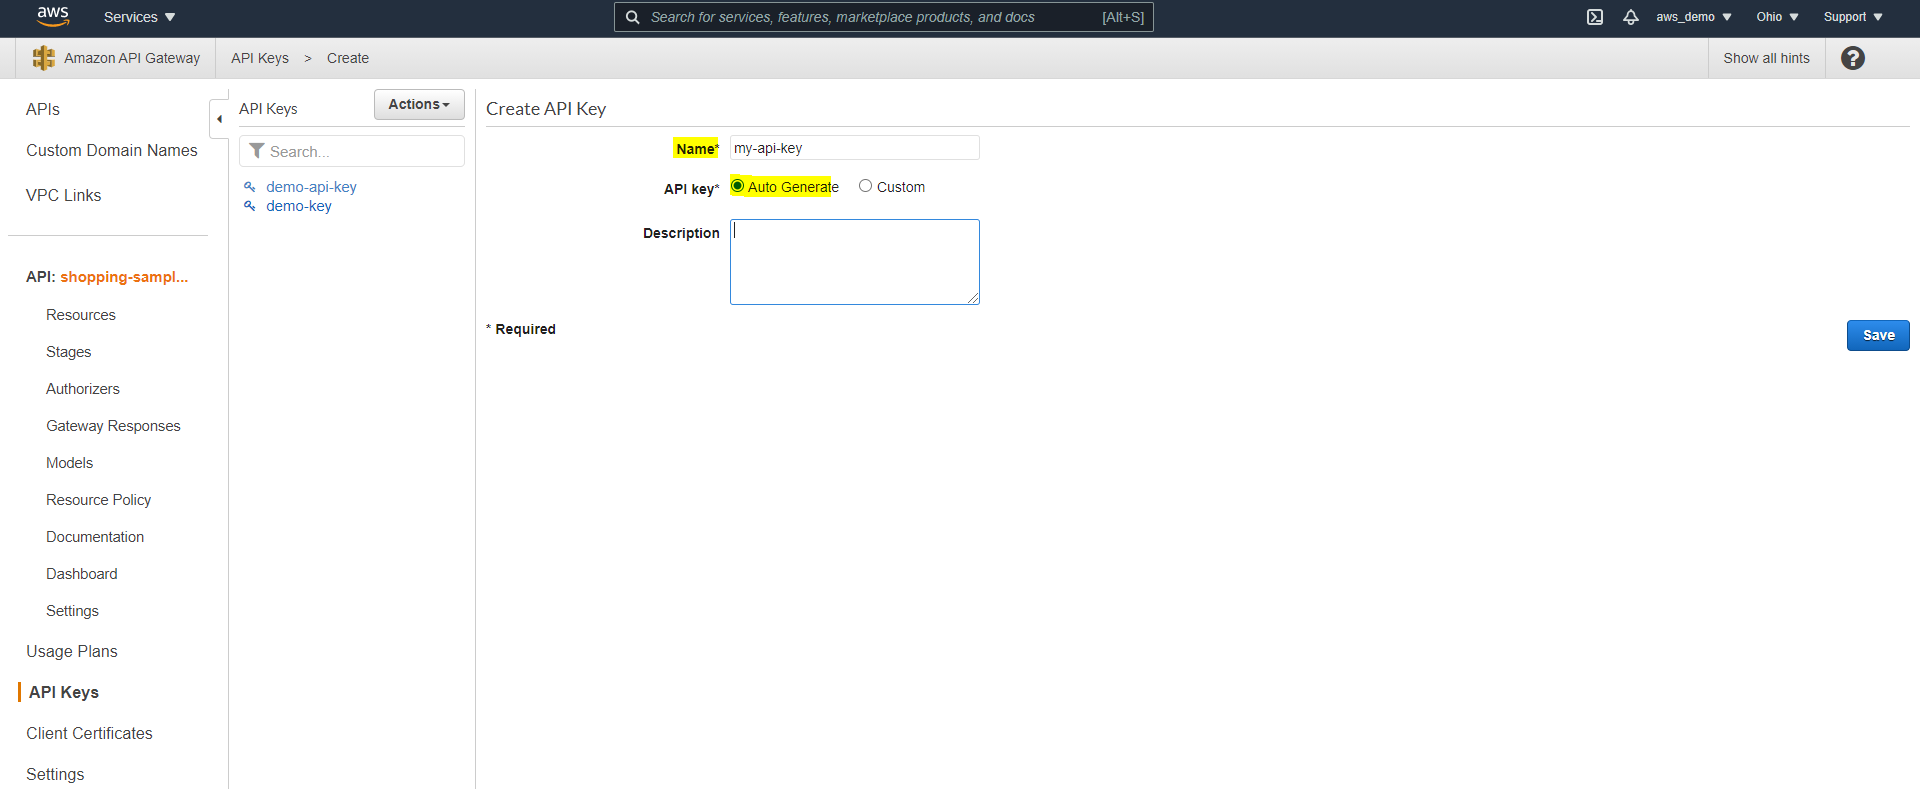
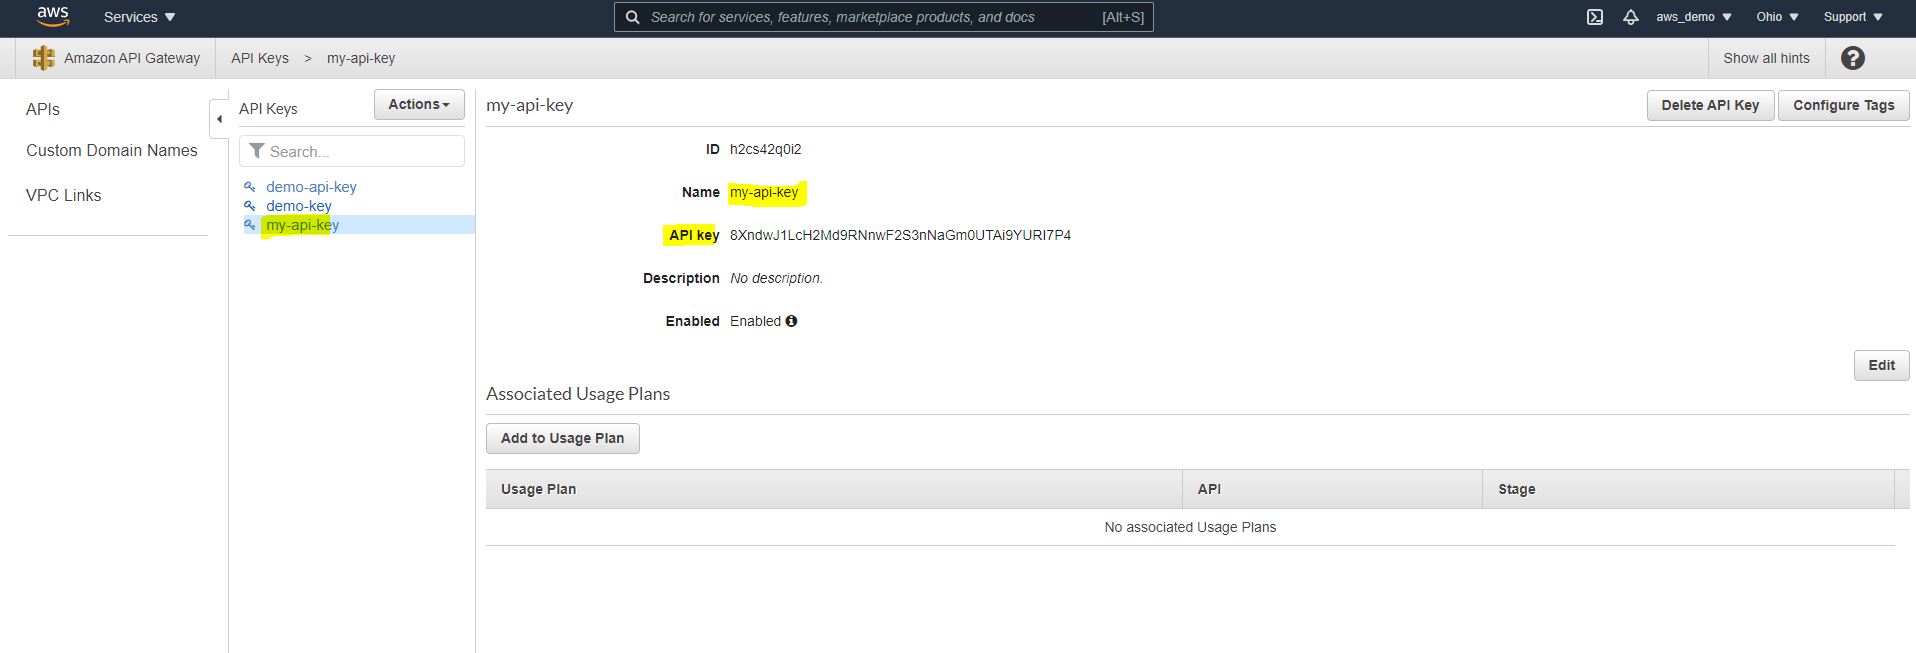
Step 21: Create an API Key
To enforce usage policies, an API key must now be created.
- Navigate to API Keys
- Click Create API Key
- Select Auto Generate or provide a custom key
- Save the key
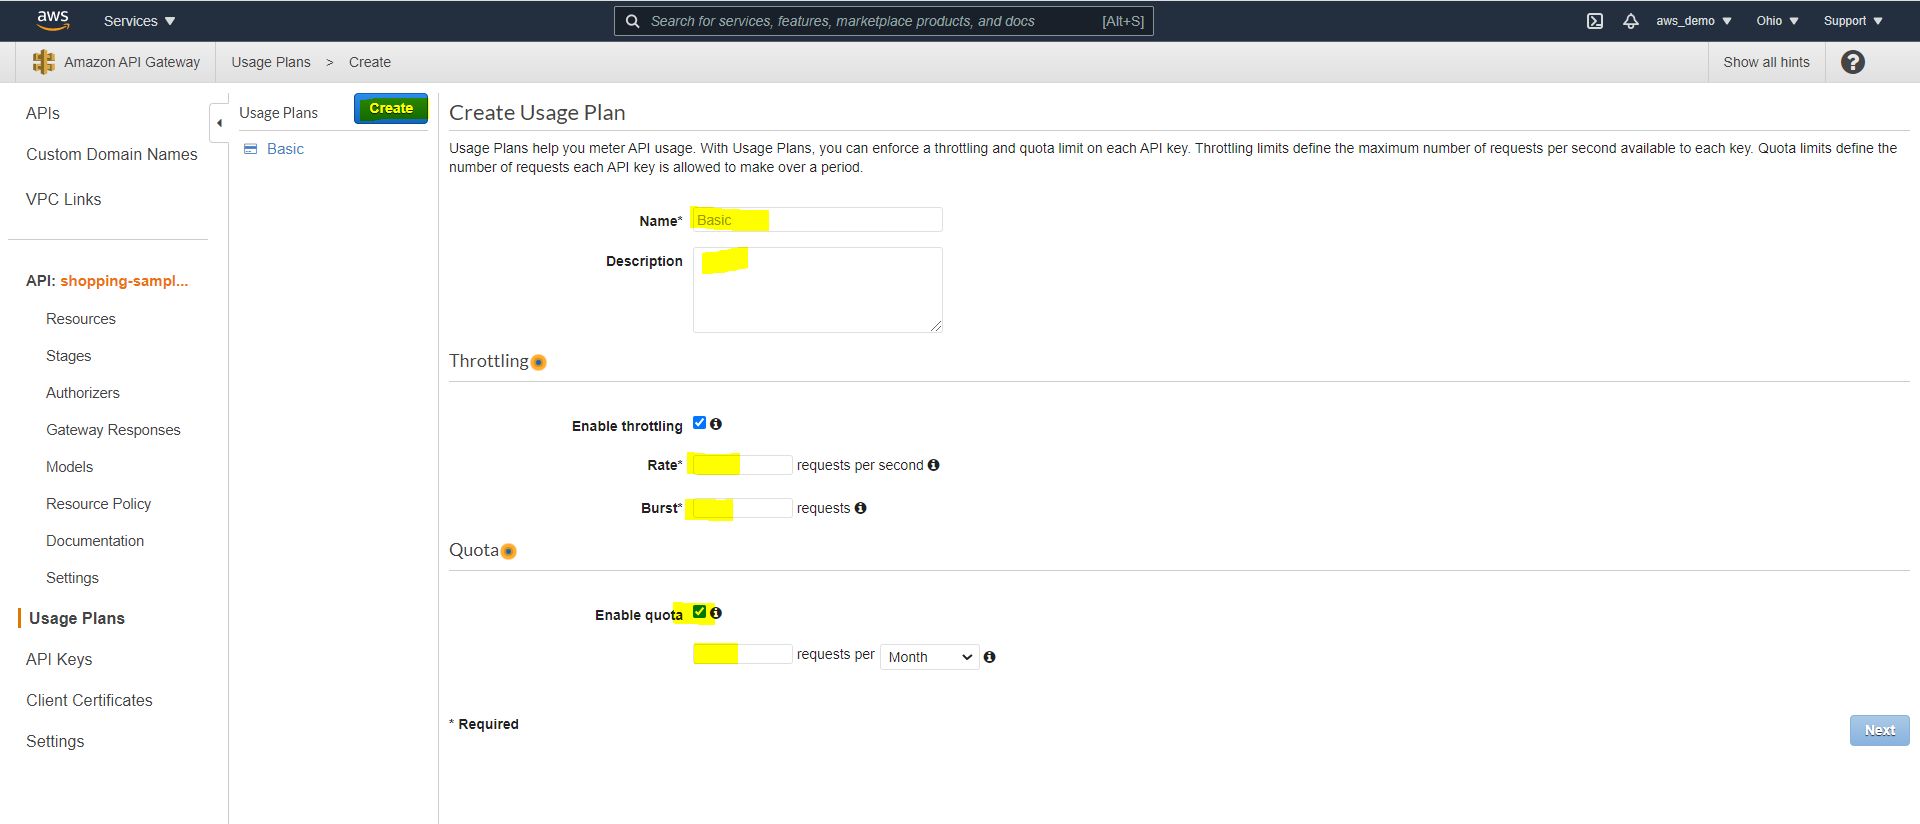
Step 22: Create a Usage Plan
In addition, a usage plan is required to apply throttling and quotas.
- Navigate to Usage Plans
- Define throttling rate, burst rate, and quota
- Click Next
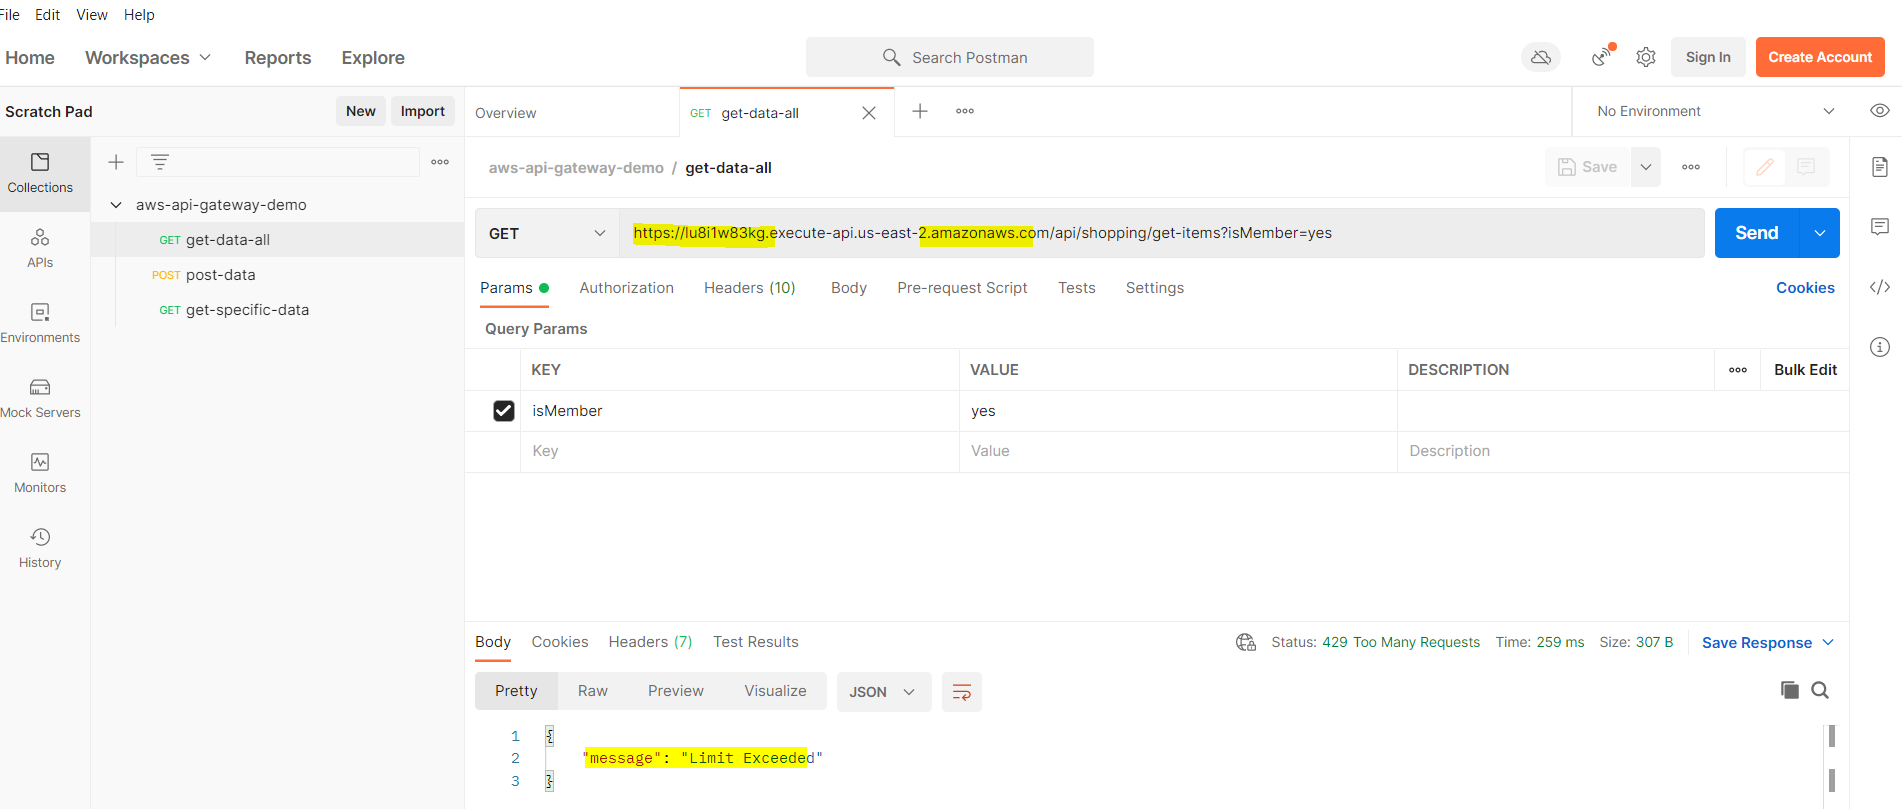
Step 23: Attach API Stage and Key
Next, the API stage and key must be associated with the usage plan.
- Select the deployed API stage
- Attach the API key to the usage plan
- As a result, redeploy the API Gateway.
Finally, test rate limiting by exceeding the defined threshold and verify HTTP 429 responses.
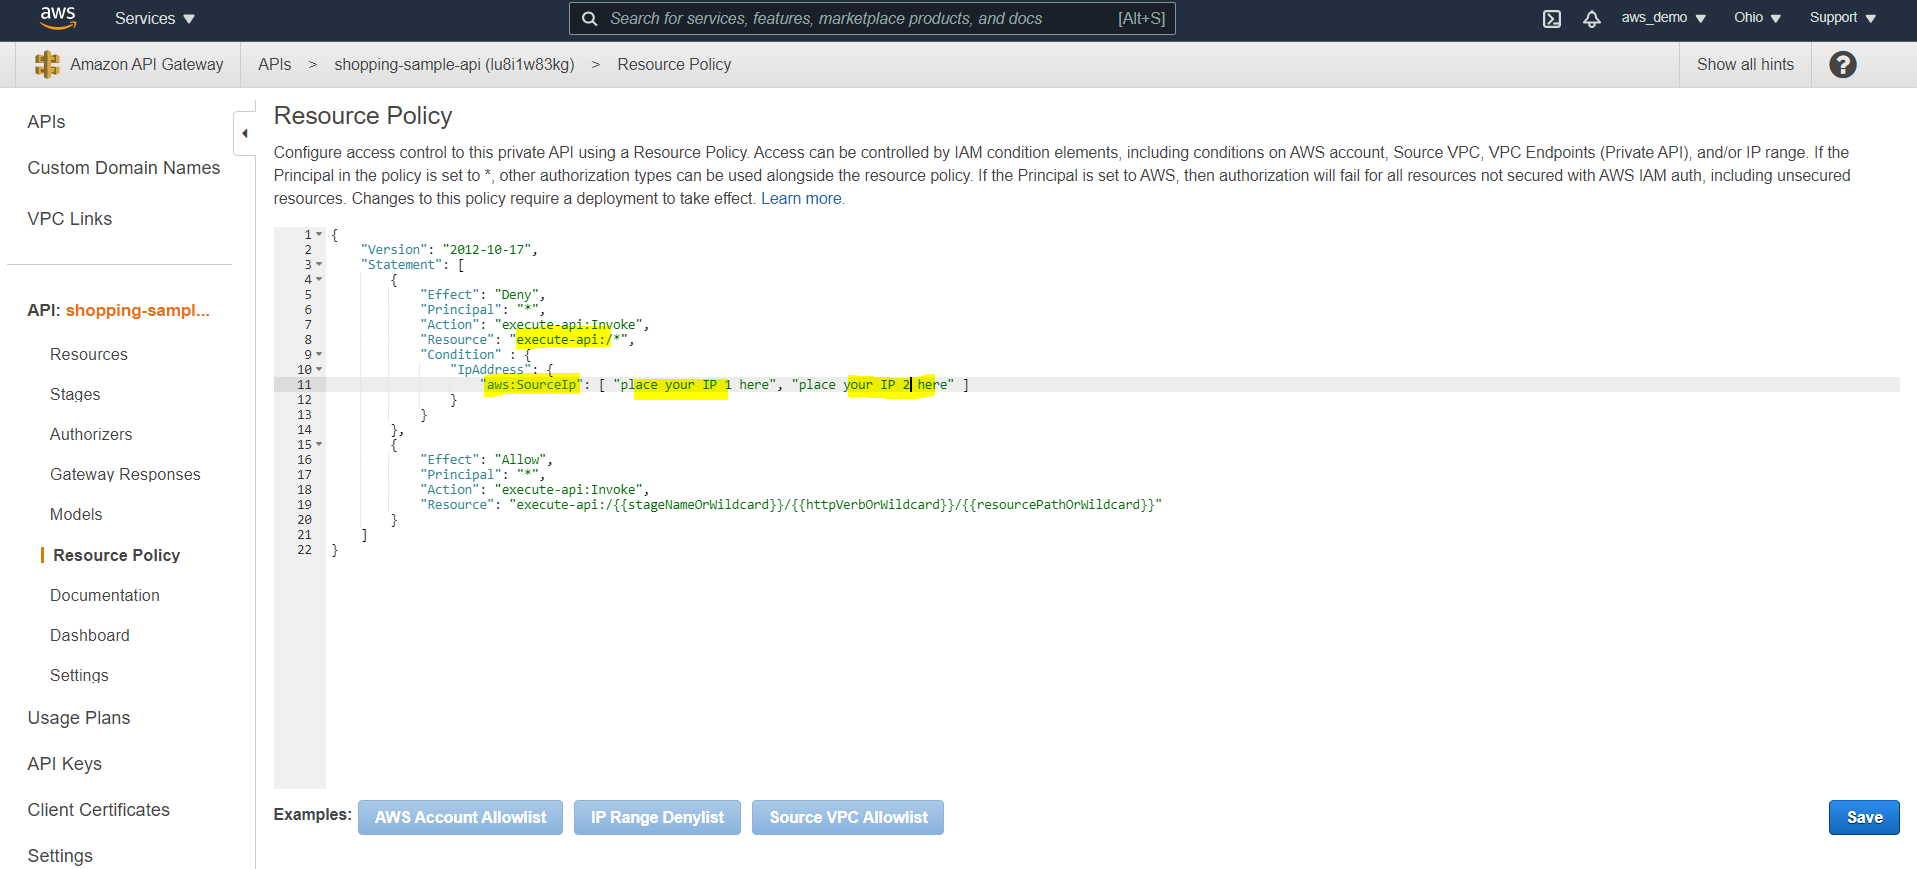
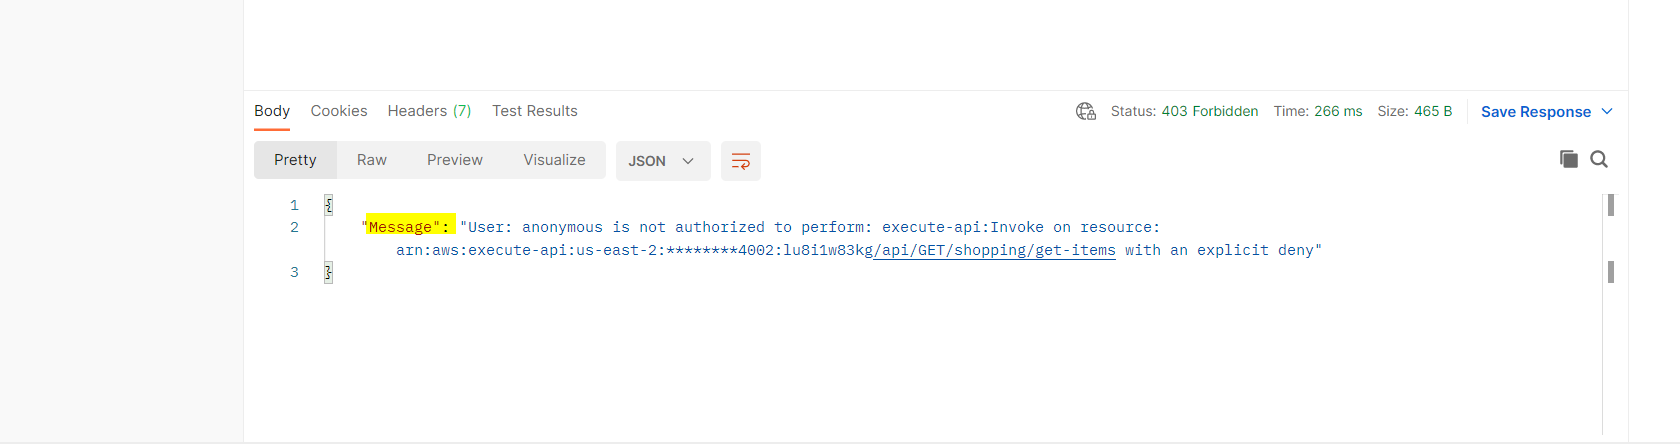
Step 24: Configure IP Allowlisting and Denylisting
For enhanced security, IP-based access rules can now be configured.
- Navigate to Resource Policy
- Select IP deny or allow list
- Modify the policy to use wildcards where required
- Add IP addresses to be blocked or allowed
Redeploy and test from a restricted IP.
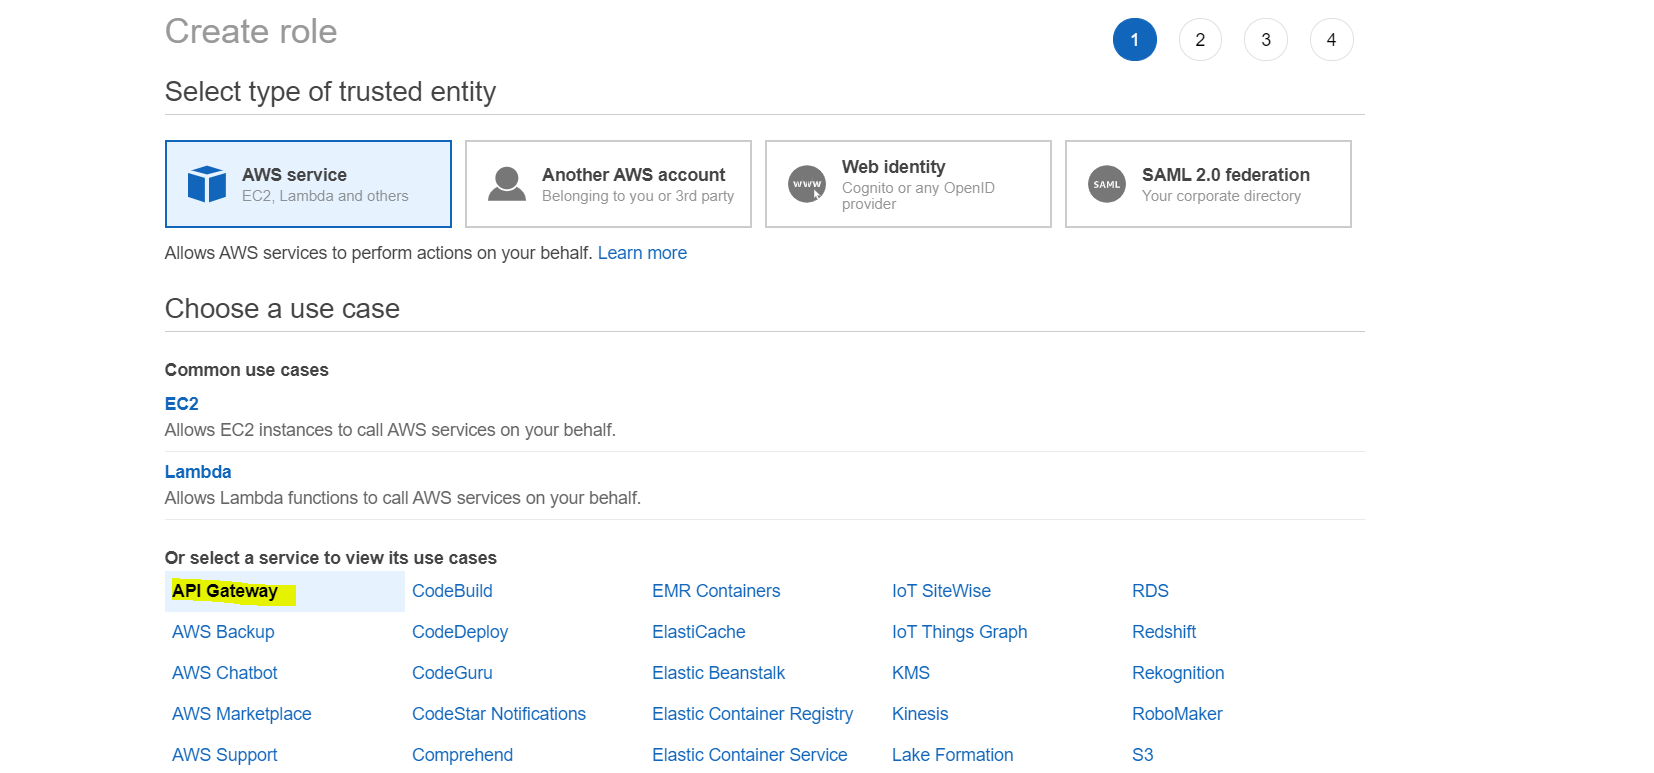
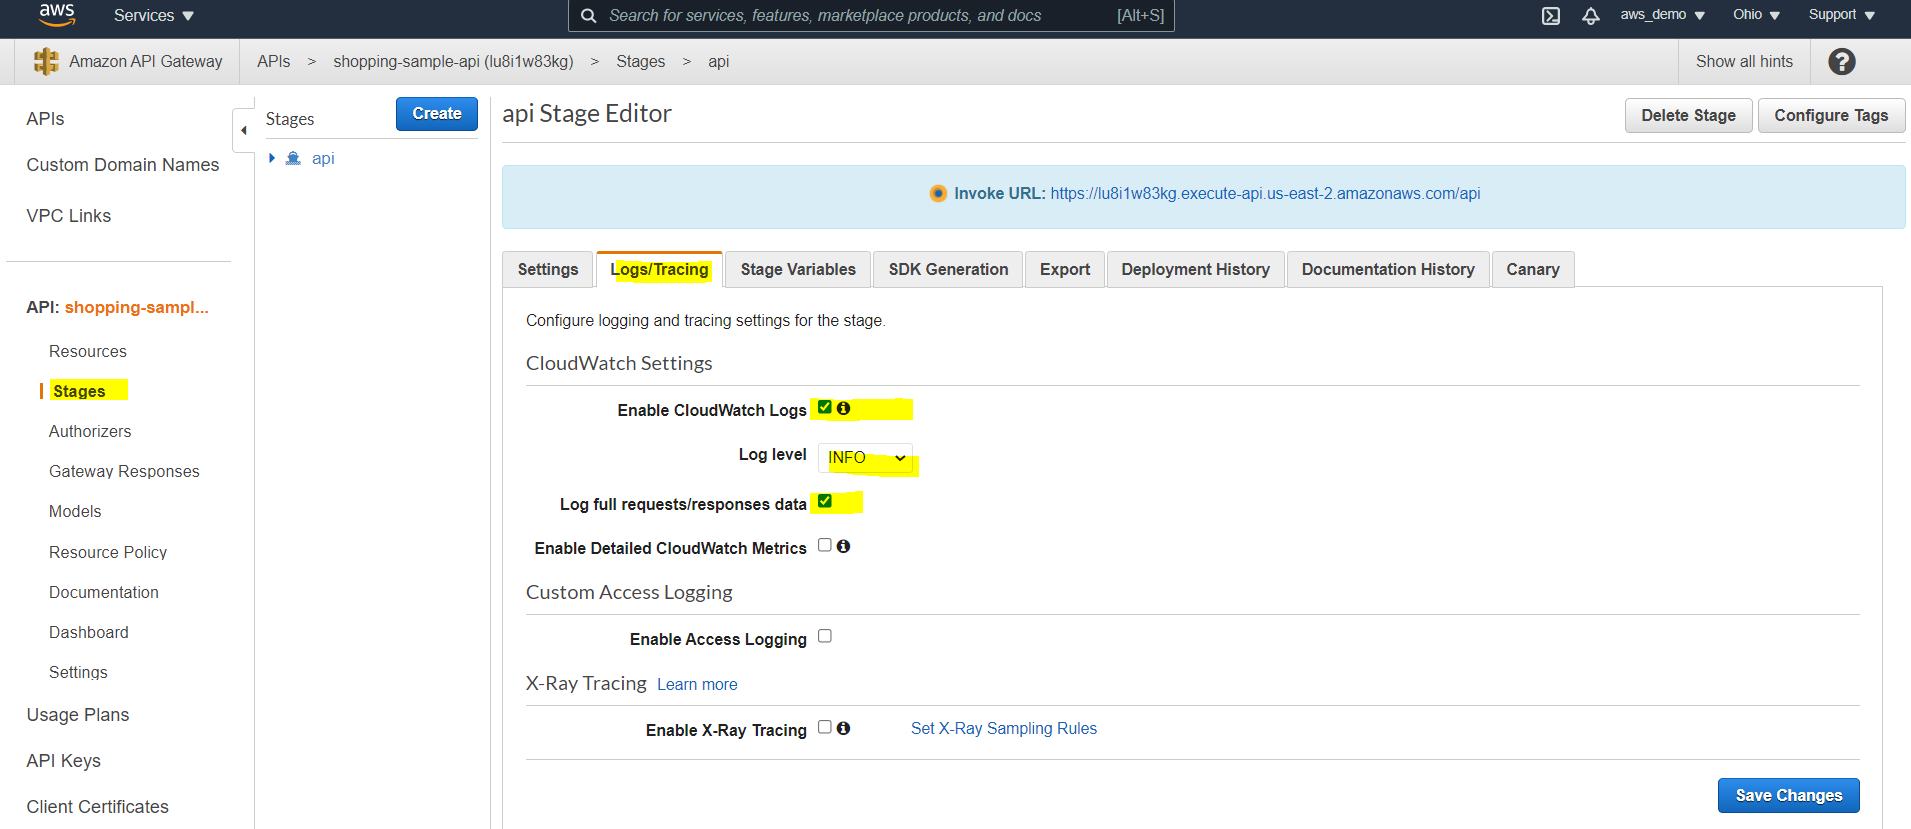
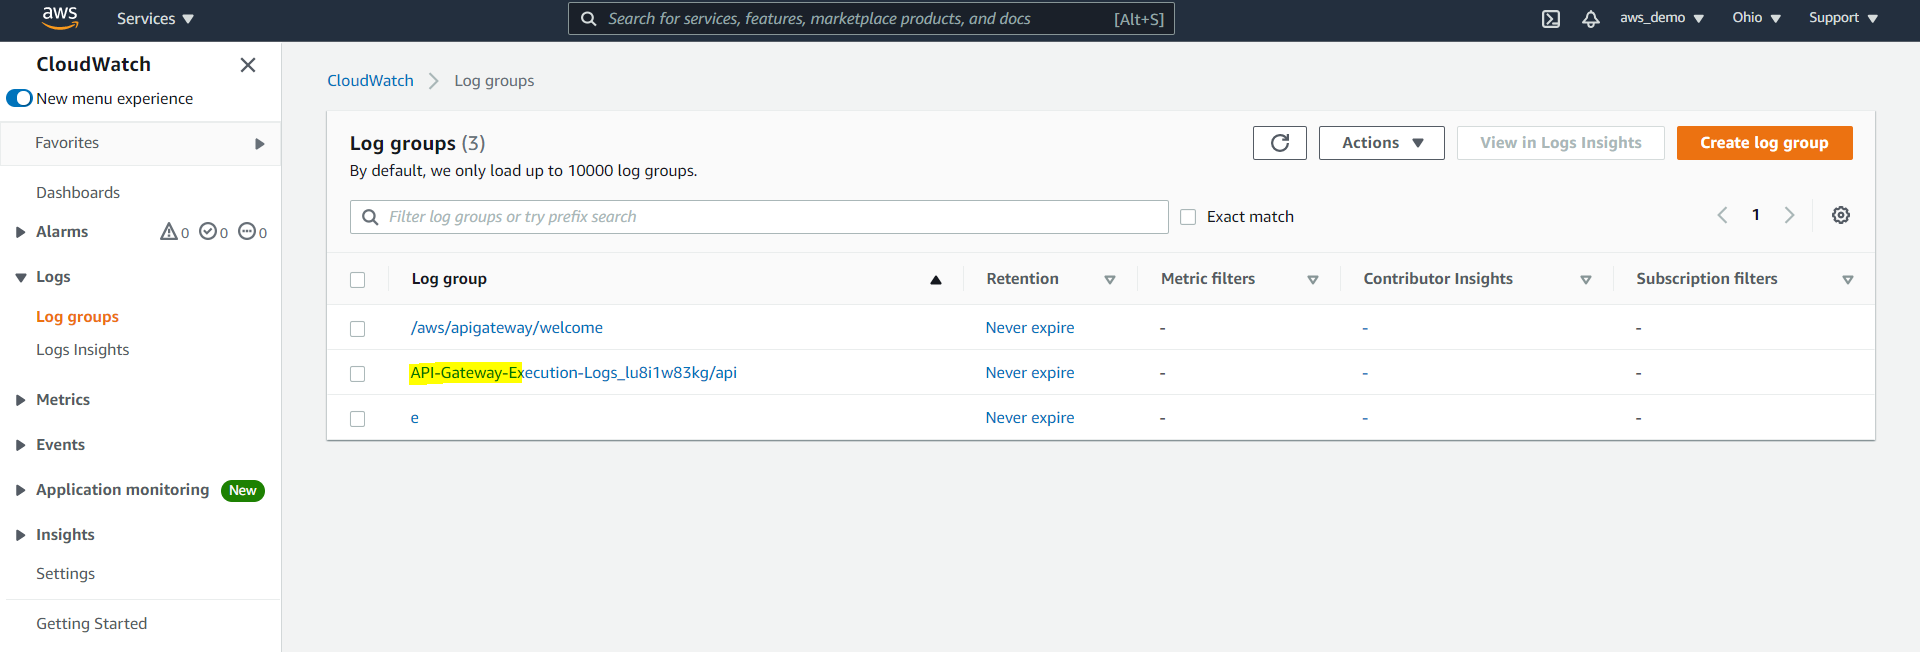
Step 25: Enable CloudWatch Logging
Finally, logging should be enabled to monitor API activity and troubleshoot issues. To view logs:
- Navigate to Security Credentials
- Create a new IAM role
- Select API Gateway as the trusted service
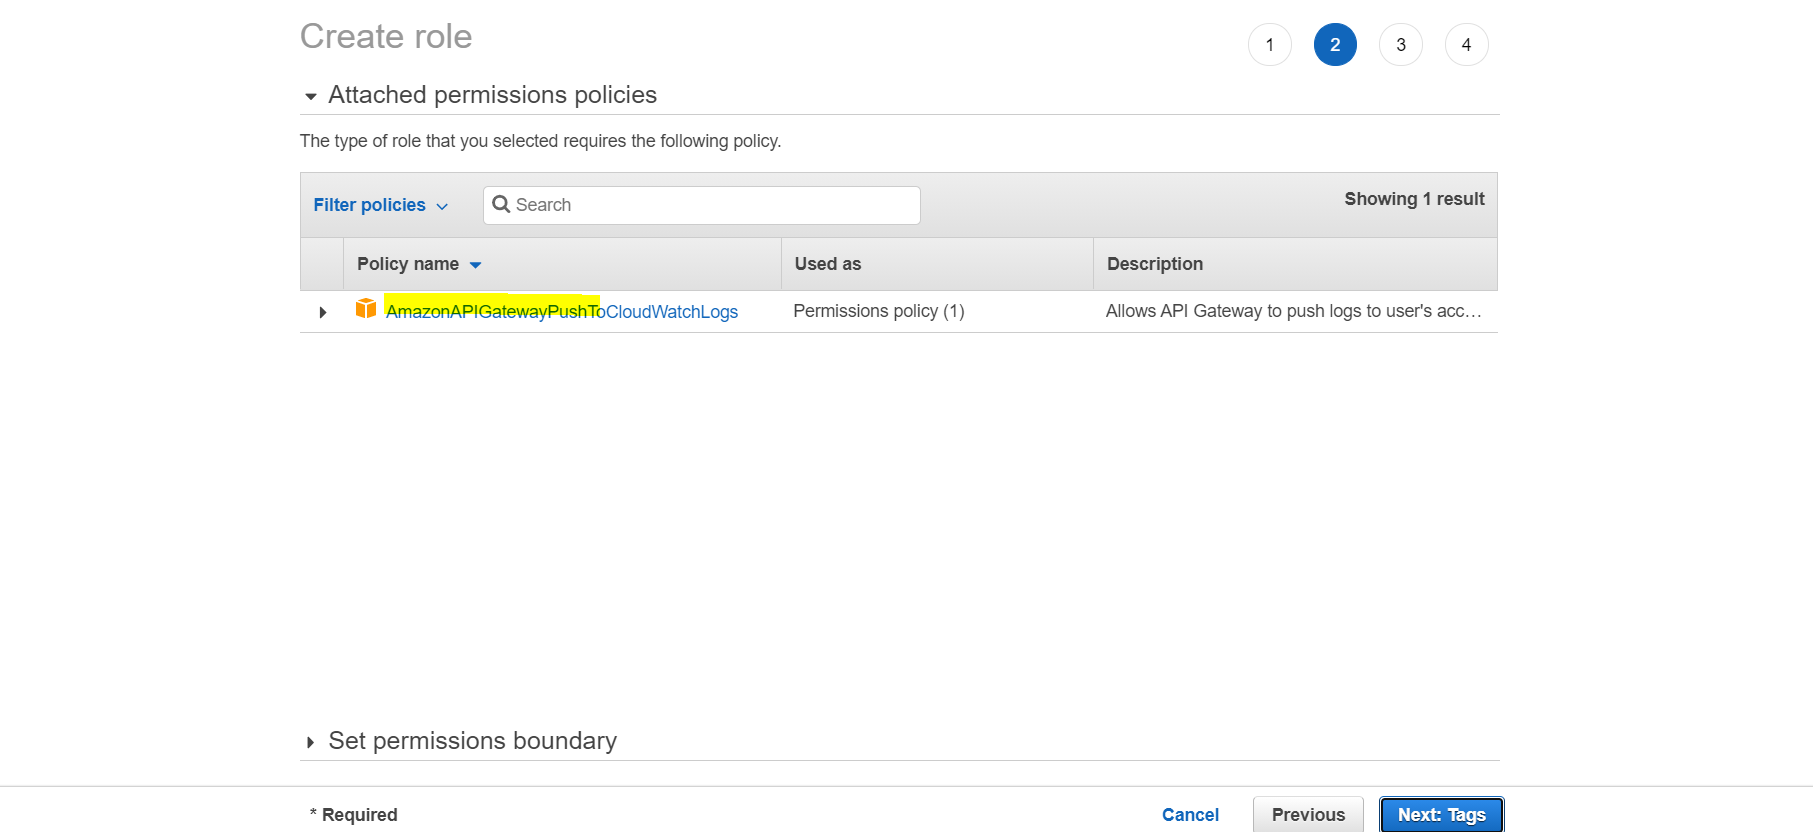
- Confirm the policy
AmazonAPIGatewayPushToCloudWatchLogs - Create the role and copy the Role ARN
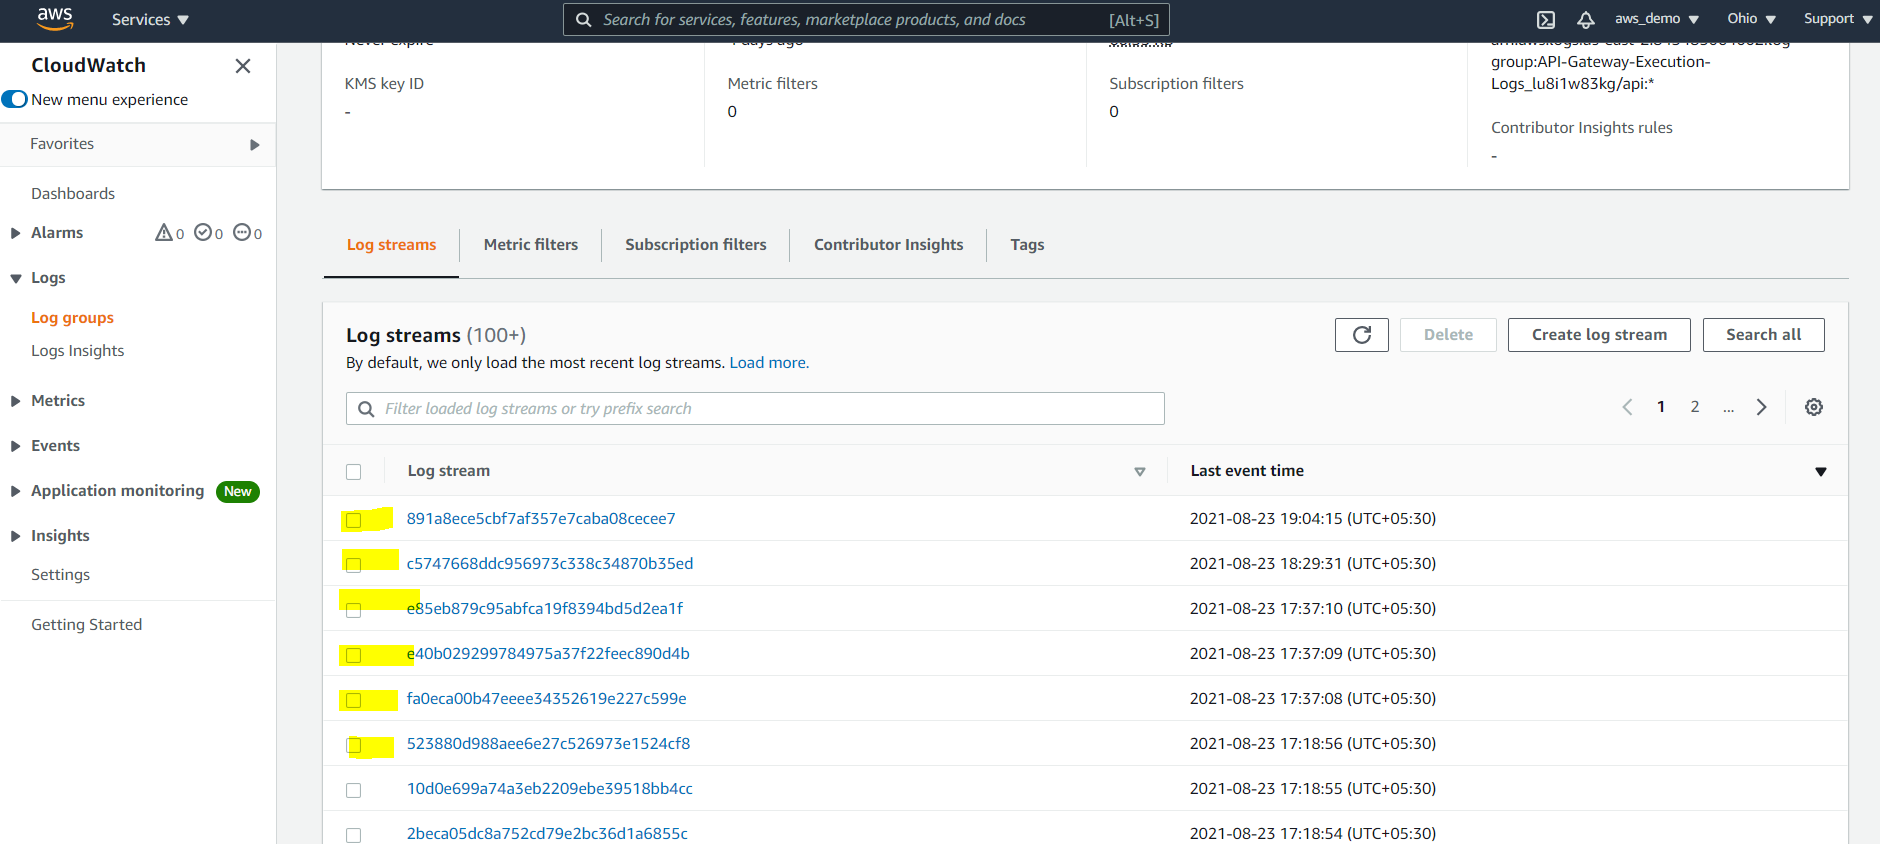
Paste the Role ARN in API Gateway settings, enable logging at the stage level, redeploy the API, and view logs in CloudWatch Log Groups.
Conclusion
As organizations scale their integration landscape, they often evaluate enterprise integration solutions to standardize API management, security, and governance across platforms. In summary, this walkthrough demonstrates a complete external gateway setup for MuleSoft APIs. By following these steps, AWS API Gateway is successfully integrated with MuleSoft APIs deployed on CloudHub. Non-functional requirements such as rate limiting, IP restrictions, and logging are enforced using AWS-native capabilities, providing a flexible alternative to MuleSoft API Manager. As a result, teams can manage security, traffic, and monitoring without relying on MuleSoft API Manager.
References
https://docs.aws.amazon.com/apigateway/latest/developerguide/welcome.html